
This article is a sneak peek from an upcoming update of my book, End-to-End Testing with TestCafe. If you're interested in learning more about the book, visit https://testingwithtestcafe.com, or enter your email address below to receive the first three chapters of the book free.
Want to boost your automation testing skills?
Enter your email address below to receive the first three chapters of the End-to-End Testing with TestCafe book for free.
Around the Internet, you likely have run into websites that render content from a completely different website right on the page. These elements are known as iframes or inline frames. An iframe is a standard HTML element that allows developers to embed content from another source, either on the same website or elsewhere.
While the use of iframes is less common these days, especially as browsers add support for more dynamic functionality, you'll still encounter iframes on plenty of websites. Some websites are so clever in their implementation of iframes that you probably haven't noticed them. A few areas where you might run into iframes are:
- Advertising solutions that contain separate tracking codes for customers.
- Services that allow you to embed their media to other websites, such as YouTube or SoundCloud.
- Complex web applications like Gmail, which splits different functionality like emails and messaging.
The way iframes work is that they represent a separate browsing context - the environment used by a browser to display the website (also known as the HTML Document). Anywhere a browser renders a website, like opening a new window or tab in modern browsers, you're seeing it in a browsing context.
With iframes, you'll have access to a distinct browsing context from the main Document interface. The iframe renders its own Document, containing a separate session history. This separation lets web developers insert content from different web pages relatively safely and avoid common problems like dealing with cross-domain policies or loading different file types like PDFs or videos.
A website with an iframe element will have two browsing contexts - the main window's context and the iframe's context. The iframe's browsing context provides a measure of segregation from the contents of the parent, but that doesn't mean you can't have any interaction between the main window and the iframe. Most browsers have methods to access different browsing contexts, but you'll have to do so explicitly.
If you have to write automated tests for iframes, you'll find that the testing process can be tricky because of the separate browsing contexts. You have to tell your tests when to access your main window and any iframes on the page you're testing. Some testing frameworks don't have proper support for this context switching, making test automation more difficult for these types of interactions.
Thankfully, TestCafe makes testing websites containing iframes simple with helpful built-in methods to switch between different browsing contexts. In this chapter, we'll dive back into the TeamYap application to see how to use these methods to help you validate any website containing iframes.
Testing websites with iframes
To demonstrate how browsing contexts can affect your test automation, let's take an example from the TeamYap website and write some automated tests and see how TestCafe handles iframes.
On the TeamYap website, there's a section where non-admin team members can simulate leaving feedback to the TeamYap space administrator. The Feedback section is a simple form with a text field and a submit button, similar to other areas on TeamYap like the Feed section.
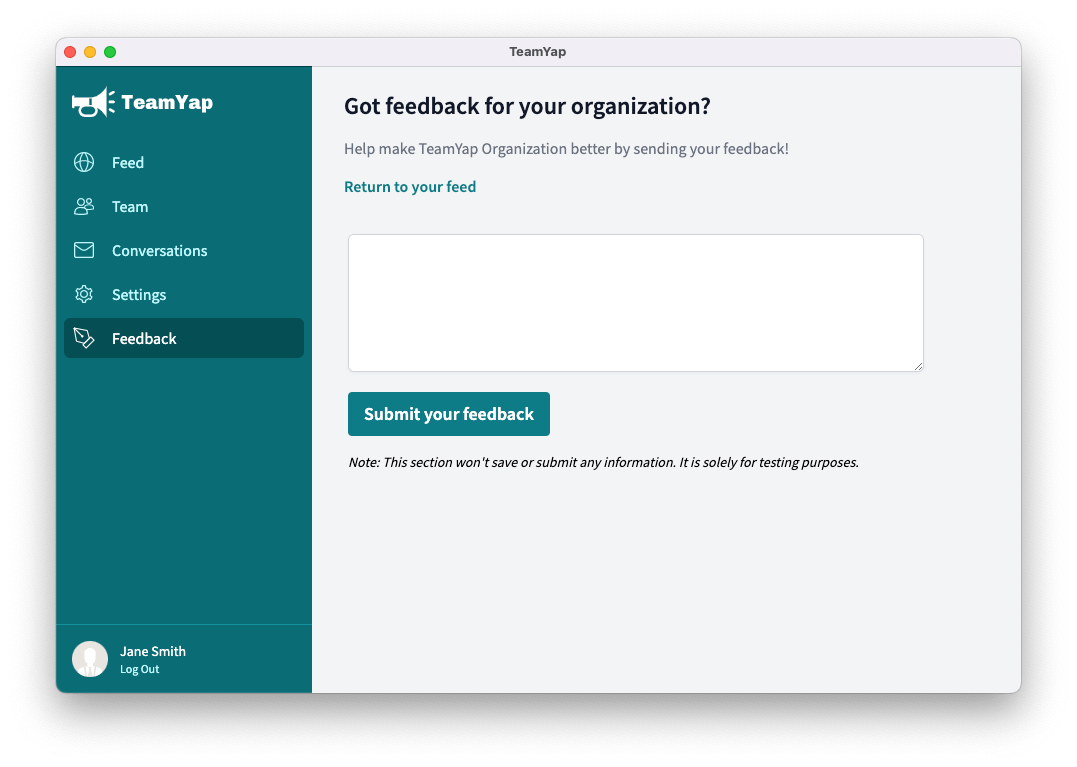
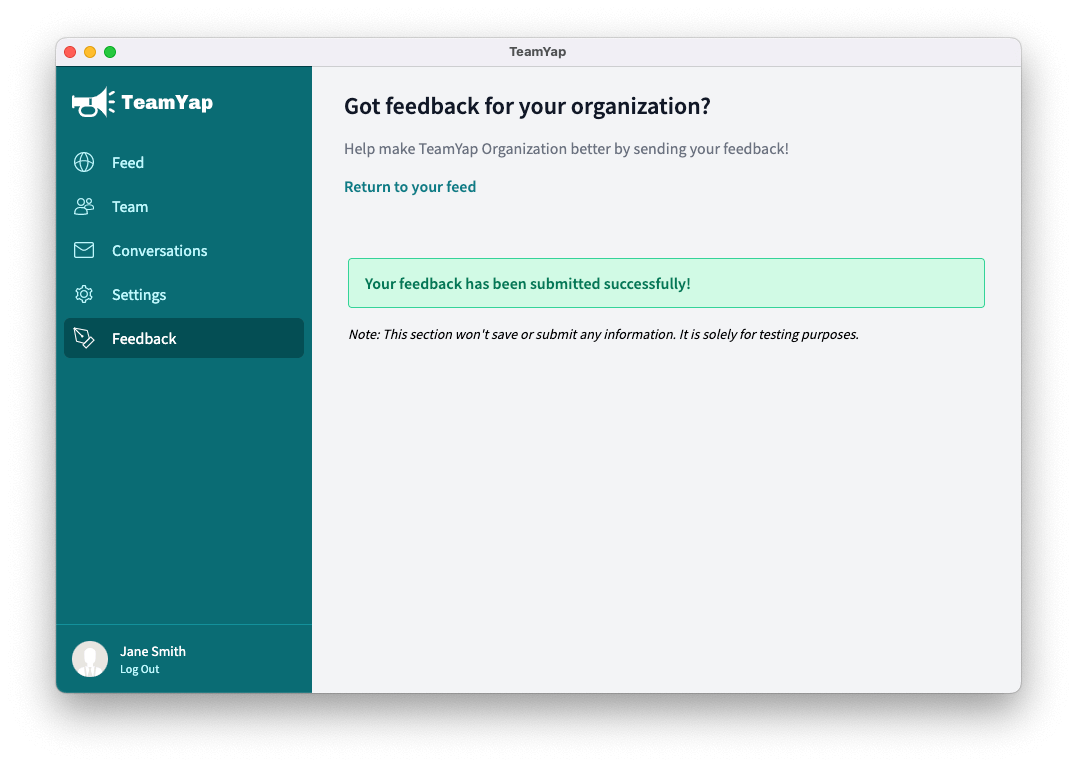
When a TeamYap team member enters their feedback in the text area and submits the form, they'll see a message indicating a successful submission.
While it looks like this form is rendered in the main document, it's set inside of an iframe. It won't look like there's an embedded frame for the form to the end-user. When a user enters their feedback into the text area and submits the form, the iframe will reload its browsing context separately from the parent. It will look as if the form submission happened dynamically, but the form doesn't contain any dynamic elements. The contents within the iframe worked like a standard HTML form on a website.
Try it out for yourself on your TeamYap account to have an idea of how the form submission works. Once you've seen how it's working, let's write a test covering this functionality. Based on what you've learned about TestCafe so far, your first attempt at an automated test for this form will likely cover finding the selector for the text area, filling it out, and clicking on the submit button. Let's give it a try.
Creating a new test for the feedback form
First, we'll create a new Page Object Model to hold our selectors for the feedback form. We'll need to set up the elements for filling out the feedback, like the text area and the button to submit the form. We'll also want the element containing the success message to run an assertion. Finally, the page includes a link to return to the feed, so we'll use that to get back to the main area of TeamYap. Create a new file called feedback_page_model.js in the models sub-directory to set up these selectors:
import { Selector } from "testcafe";

class FeedbackPageModel {
  constructor() {
    this.feedbackTextarea = Selector("#feedback");
    this.feedbackSubmitButton = Selector("#feedback_submit");
    this.successNotice = Selector(".feedback-submit-success");
    this.returnToFeedLink = Selector("a.return-to-feed-link");
  }
}

export default new FeedbackPageModel();
We can create a new test case to cover the feedback form submission with the Page Object Model prepared. Create another new file inside your home test directory called feedback_test.js. Using your preferred code editor, we'll create a new test that will start on the feedback page, fill out the text area, and submit the form:
import feedbackPageModel from "./models/feedback_page_model";
import feedPageModel from "./models/feed_page_model";
import { regularUser } from "./helpers/roles";

fixture("TeamYap Feedback")
  .page("<https://teamyap.app/feedback>")
  .beforeEach(async t => {
    await t
      .useRole(regularUser)
      .navigateTo("<https://teamyap.app/feedback>");
  });

test("Regular user can submit feedback to the TeamYap organization admin", async t => {
  await t
    .typeText(feedbackPageModel.feedbackTextarea, "This is my feedback")
    .click(feedbackPageModel.feedbackSubmitButton);

  await t
    .expect(feedbackPageModel.successNotice.exists)
    .ok();

  await t
    .click(feedbackPageModel.returnToFeedLink);

  await t
    .expect(feedPageModel.postTextarea.exists)
    .ok();
});
In this test, we begin by importing the new Page Object Model created for the feedback section and the Page Object Model for the main feed section we created earlier in the book. The feedback form is only accessible to non-administrator accounts on TeamYap, so we'll set up the regularUser role that already exists in the code repository.
For the test actions, it goes through a now-familiar routine of typing inside a text area and clicking a button on the page. The test contains two assertions: verifying the success notification after submitting the form and ensuring the "Return to your feed" link takes the user back to their feed.
Unfortunately, this test will fail if you attempt to execute it. If you observe the test running in the browser, you'll see the TeamYap site load and navigate correctly to the feedback page. However, TestCafe can't find the text area on the page, despite it being clearly visible on the screen. This failure occurs because the element is inside an iframe. TestCafe won't find any elements inside an iframe implicitly due to its separate browsing context, so using selectors as we did in the test won't work for this automated test.
TestCafe methods for interacting with iframes
Lucky for us, TestCafe has built-in mechanisms to switch between the main window and the iframe. We'll cover the two primary functions you can use for writing automated tests for websites containing iframes.
switchToIframe
The switchToIframe method from TestCafe's test controller object allows you to switch your browsing context to an existing <iframe> element inside the page under test. This method will enable you to interact with the iframe's elements during your tests in the same way you already do with the main window.
The method requires an argument for targeting the <iframe> element on the page. Like the argument used in other methods that require identifying elements, the argument for switchToIframe can be a string representing a CSS selector, a Selector object, or a function that executes on the browser and returns a DOM element. The test will fail if the specified element is not found or is not an <iframe> element.
/*
  Example HTML fragment:

  <div>
    <span id="span_element">
      I'm an element in the main window</span>

    <iframe id="inline_frame">
      <!-- iframe contents go here -->
    </iframe>
  </div>
*/

// Switches the browsing context to the iframe
// located on the webpage.
await t.switchToIframe("#inline_frame");

// The #span_element selector is not an iframe,
// so this will cause the test to fail.
await t.switchToIframe("#span_element");
switchToMainWindow
When you're inside an iframe's browsing context, you can switch back to the main window's context using the switchToMainWindow method. This method allows you to regain access to the main window's elements after interacting with any iframes during your tests.
The switchToMainWindow method doesn't require any arguments. If your test is already in the main window's browsing context and you call this method, TestCafe will ignore it and proceed with the test run.
// Switches the browsing context for TestCafe to
// the main window if your test's context is set
// to an iframe using switchToIframe before this.
await t.switchToMainWindow();
Fixing our iframe test
Now that you know how to interact with iframes within a TestCafe test, let's put these methods to use to fix the failing test. First, we'll need to set up the selector for the <iframe> element on the page. After finding the ID of the element, we can set it up in the Page Object Model for the feedback page:
import { Selector } from "testcafe";

class FeedbackPageModel {
  constructor() {
    // Selector added to identify the iframe element.
    this.feedbackFrame = Selector("#feedback_frame");
    this.feedbackTextarea = Selector("#feedback");
    this.feedbackSubmitButton = Selector("#feedback_submit");
    this.successNotice = Selector(".feedback-submit-success");
    this.returnToFeedLink = Selector("a.return-to-feed-link");
  }
}

export default new FeedbackPageModel();
Now we can use the switchToIframe and switchToMainWindow methods in our test to fill out the feedback form, submit it, and return to the feed as we intended in our initial attempt:
import feedbackPageModel from "./models/feedback_page_model";
import feedPageModel from "./models/feed_page_model";
import { regularUser } from "./helpers/roles";

fixture("TeamYap Feedback")
  .page("<https://teamyap.app/feedback>")
  .beforeEach(async t => {
    await t
      .useRole(regularUser)
      .navigateTo("<https://teamyap.app/feedback>");
  });

test("Regular user can submit feedback to the TeamYap organization admin", async t => {
  // Switch to the iframe to access the elements in
  // the feedback form.
  await t
    .switchToIframe(feedbackPageModel.feedbackFrame);

  await t
    .typeText(feedbackPageModel.feedbackTextarea, "This is my feedback")
    .click(feedbackPageModel.feedbackSubmitButton);

  await t
    .expect(feedbackPageModel.successNotice.exists)
    .ok();

  // Switch back to the main browsing context to
  // access the link back to the feed.
  await t.switchToMainWindow();

  await t
    .click(feedbackPageModel.returnToFeedLink);

  await t
    .expect(feedPageModel.postTextarea.exists)
    .ok();
});
When the feedback page loads, we'll switch into the iframe using the switchToIframe method on the test controller object and specifying the new selector added to the Page Object Model. This step will allow us to interact with the feedback form elements. We can now fill out the form and submit it successfully. After making sure the success message pops up, we'll switch back to the main window's browsing context so we can click on the "Return to your feed" link.
If you found this article useful, you can order the End-to-End Testing with TestCafe book at https://testingwithtestcafe.com. You can also enter your email address below to receive the first three chapters of the book for free.
Want to boost your automation testing skills?
Enter your email address below to receive the first three chapters of the End-to-End Testing with TestCafe book for free.