
In a past article on Dev Tester, I covered Mailosaur for helping you automate testing your emails. Mailosaur is a service that provides virtual mail servers that capture your test emails, which you can access through a nicely-built API.
The service is handy if you need to automate your email testing in your organization. However, I've seen many people balk at Mailosaur's pricing. As of this writing, Mailosaur begins from $19 a month for a single user account. The price for the next tier goes up significantly to $69 a month for a business account which provides access to multiple users.
I've also noticed a trend of more individuals and organizations seeking privacy-focused solutions for their services. When you use any third-party service you don't host, you don't know for sure how the company behind the service uses your data. You can read through Mailosaur's privacy policy, but I'm not a lawyer, and I can't say what they do with any information you send to their servers.
While I think a service like the one Mailosaur provides is worth it for automating email testing, I can also see how some people, especially small bootstrapped teams and privacy zealots, would think twice about using a service like this. Some can't afford a monthly subscription for this service, and others wouldn't want to send potentially sensitive data somewhere where they have no control over its access.
You don't have to settle for using Mailosaur or any other third-party service, however. One of the most common alternatives I see offered for email testing is an open-source application called MailHog. I've seen the tool mentioned often, so I was curious to test it out. How does it work, and how does it stack up to a paid service like Mailosaur? This article answers those questions.
What is MailHog?
MailHog is an email testing tool that sets up an SMTP email server for development and testing environments. You can send real emails from your application to MailHog, and MailHog captures the message. It has a web interface where you can see any received emails and reset the mailbox.
There are a few tools out there that provide similar functionality specific to the programming languages and frameworks you use to build your application. For example, Ruby on Rails has letter_opener_web, and Python's Django has django-naomi.
However, the main benefit of using a tool like MailHog for automated testing is the ability to access messages through an API. MailHog does provide this functionality through its JSON API. You can retrieve a list of emails, view the contents of an individual message, reset your test mailbox, and more.
The primary reason why someone would want to use MailHog as opposed to a service like Mailosaur is that there's no subscription fee. MailHog is open source and completely free. All you need to do is download MailHog and run the service on your hardware. That's all you need to a fully functional server ready to go. And since you handle where MailHog goes, you'll know where all your data is.
Using MailHog with TestCafe
To explore what MailHog can do to help with testing your application's emails, we'll use the TestCafe testing framework. I've covered how to get started with TestCafe in a previous Dev Tester article, so make sure to read that if this is your first time using TestCafe.
We'll also use an application I built for testing purposes called Airport Gap. The primary reason I created this application is to help with practicing API testing. The app also sends a few emails, which is useful for practicing automated email testing as we'll do here.
This article assumes MailHog is up and running, and the Airport Gap application sends its emails to the MailHog server. I won't cover those steps in detail for this article. There are a few ways to set up the MailHog service so you can choose which one is more appropriate for your needs.
Testing the token generation email
For the first test, we'll verify that the Airport Gap application sends an email when someone generates a new token.
The first step is to begin organizing our tests from the beginning by creating a page model class to define our selectors for the test. Create a new sub-directory called page_models in your test directory. Inside this sub-directory, create a new file called sign_up_model.js and write your class inside:
import { Selector } from "testcafe";

class SignUpModel {
  constructor() {
    this.emailInput = Selector("#user_email");
    this.passwordInput = Selector("#user_password");
    this.submitButton = Selector("input[type='submit']");
  }
}

export default new SignUpModel();
Now we can write our test using the page model class we just created. Create a new file inside the main test directory called sign_up_test.js and write your test inside:
import { v4 as uuidv4 } from "uuid";

import signUpModel from "./page_models/sign_up_model";

const mailhog = require("mailhog")();
const emailAddress = `${uuidv4()}@dev-tester.com`;

fixture("Airport Gap Signup Flow")
  .page("https://airportgap-staging.dev-tester.com/tokens/new")
  .beforeEach(async () => await mailhog.deleteAll());

test("User receives an email after signup", async t => {
  await t
    .typeText(signUpModel.emailInput, emailAddress)
    .typeText(signUpModel.passwordInput, "airportgap123")
    .click(signUpModel.submitButton);

  await t.wait(2000);

  const message = await mailhog.latestTo(emailAddress);

  await t.expect(message.subject).eql("Here's your generated token");
  await t.expect(message.html).contains("Here's your newly generated Airport Gap token");
});
We're doing a lot of different things in this file, so I'll break down the fundamentals in this test to explain further.
In the first line, we'll set up the node-uuid library to use UUID Version 4. I chose Version 4 since it's a randomly-generated string that doesn't depend on other factors. Any version of UUID works well with little chance of duplication, so there's no particular reason to choose this version.
After importing our page model class, we'll instantiate a new object of the mailhog-node library. This library provides a useful, simple way to interact with MailHog's API. It helps with retrieving emails from MailHog without having to fetch and process the API responses manually.
Next, we generate a unique email address to use when signing up for a token on Airport Gap to avoid clashes with existing email addresses in the system. For this, we use the node-uuid library to help us create an email address starting with a unique string such as 27cd1cb5-74e9-4fea-9cf2-c71e285007b25.
Before starting our test, we tell TestCafe to begin on the token generation signup page for Airport Gap. We also add a test hook to tell TestCafe to clear any messages in the MailHog service before each test, using the client library (await mailhog.deleteAll()). This step isn't necessary, but it helps prevent potential issues with test emails sent from other tests.
Now we get to the actual testing portion of this file. The test begins by opening the browser and filling out the form on the signup page. It uses our randomly-generated email address and a simple password for generating the token. When submitting the form, the application processes the request and sends an email to the MailHog instance we have set up.
If you notice, we're adding an explicit wait of 2000 milliseconds (2 seconds) before proceeding with the next step in the test. We're doing to ensure MailHog has received and processed the message from the Airport Gap application before continuing with our test. Without the wait, there's a chance the test can't find the message, causing the test to fail. It's not an ideal solution, but for a simple example like this test, it works well enough.
After waiting for 2 seconds, we use the mailhog-node object instantiated earlier to seek the latest message sent to our generated email address and store it in the message variable as a JavaScript object. The message object contains the details about the message, such as the sender, the recipient, and message body, and any included attachments.
Now that we have our message, we can run assertions to verify the application sent the correct email. We have two assertions - one to check the email's subject to ensure the app sent the correct email, and another to check the email body contains something we expect. These two assertions are enough to validate our email.
With the test written, we can use TestCafe to run the test. For example, we run our tests with the following command:
npx testcafe chrome sign_up_test.jsIn this example, TestCafe opens Google Chrome and processes each step in the test. Before starting the test, TestCafe empties the MailHog server, so no stale emails are in the test mailbox. Then it loads the token generation signup page, fills the form, and submits it. After a brief wait, TestCafe fetches the message from our MailHog server and runs our assertions. If everything went as expected, we'd see the following results:
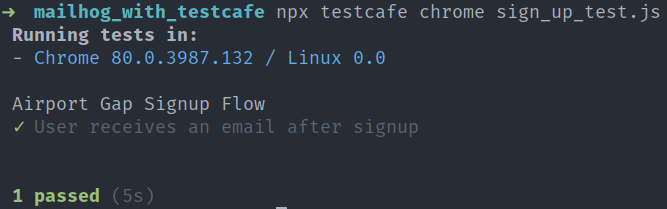
This test demonstrates a quick way to validate your emails in what's close to a real-world environment. The application under test works the same as in production. An action occurs, and the application sends an email. The main difference is that we have a place to check the email in an automated way, bypassing the need for manual intervention.
Testing the password recovery flow
The previous test demonstrates how to check the contents of an email with a tool like MailHog. It's a good test to have, but you can get more out of MailHog by automating longer, complex flows. Let's show an example by going through a password recovery process flow.
Airport Gap implements the recovery process in a way you're likely familiar with other web applications. When someone wants to reset their account's password, they fill out a form with the email address used for the account they want to reset. The application generates a unique link to allow them to reset the password and sends it via email. The person can then set up a new password and regain access to their account.
This kind of test often involves manual intervention since it involves triggering an email and retrieving the unique link to reset the password. With MailHog, we can get this information through the API and process it to our needs.
To start this test, let's define the selectors we'll use during the test. Inside the page_models sub-directory created earlier, we can create a new page model class in a new file called password_reset_model.js:
import { Selector } from "testcafe";

class PasswordResetModel {
  constructor() {
    // Selectors for sending password reset instructions.
    this.emailInput = Selector("#email");
    this.sendInstructionsButton = Selector(
      "input[type='submit']"
    ).withAttribute("value", "Send Reset Instructions");
    this.instructionsSentAlert = Selector("div[role='alert']").withText(
      "An email was sent with instructions for resetting your password."
    );

    // Selectors for resetting password.
    this.setUpInstructions = Selector("p").withText(
      "Set up a new password for your Airport Gap account."
    );
    this.passwordInput = Selector("#user_password");
    this.passwordConfirmationInput = Selector("#user_password_confirmation");
    this.resetButton = Selector("input[type='submit']").withAttribute(
      "value",
      "Reset Your Password"
    );

    // Selectors for login page.
    this.resetSuccessAlert = Selector("div[role='alert']").withText(
      "Your password was reset successfully."
    );
  }
}

export default new PasswordResetModel();
This class contains more selectors since the password recovery process covers multiple pages on the application. Next, we'll create a new file for our test called password_reset_test.js:
import passwordResetModel from "./page_models/password_reset_model";

const mailhog = require("mailhog")();
const getHrefs = require("get-hrefs");
const resetEmail = "[email protected]";

fixture("Airport Gap Password Reset Flow")
  .page("https://airportgap-staging.dev-tester.com/password_reset/new")
  .beforeEach(async () => await mailhog.deleteAll());

test("User can reset their password", async t => {
  await t
    .typeText(passwordResetModel.emailInput, resetEmail)
    .click(passwordResetModel.sendInstructionsButton);

  await t.expect(passwordResetModel.instructionsSentAlert.exists).ok();

  await t.wait(2000);

  const message = await mailhog.latestTo(resetEmail);

  await t.expect(message.subject).eql("Password reset instructions");

  const passwordResetLink = getHrefs(message.html).find(href =>
    href.includes("password_reset")
  );

  await t
    .navigateTo(passwordResetLink)
    .expect(passwordResetModel.setUpInstructions.exists)
    .ok();

  await t
    .typeText(passwordResetModel.passwordInput, "new-password-123")
    .typeText(passwordResetModel.passwordConfirmationInput, "new-password-123")
    .click(passwordResetModel.resetButton);

  await t.expect(passwordResetModel.resetSuccessAlert.exists).ok();
});
As with the previous example, we're instantiating a mailhog-node object to interact with our MailHog API. Also, this test includes a library called get-hrefs. This library allows us to search for href URLs in links inside any given HTML content. You'll see how we'll use this library further in our test.
For this test, we'll begin by loading the Password Reset page. In our application, we have a pre-existing test account set up using the email [email protected]. We can use this account instead of going through the process of creating a new account.
The test fills out the password reset form, which consists of entering an account's email address. After submitting the form, we perform a quick sanity check with an assertion to verify we have an alert stating that an email is on its way with instructions for resetting the password.
After a 2-second wait - as we did before - we fetch the message sent to the account on MailHog. We make another quick assertion to verify we're getting the correct message by checking the email subject.
Next, we have to find the link for resetting the account's password. To do this, we use the get-hrefs library to scan the email's HTML body for all URLs contained in the message with getHrefs(message.html). This function scans the given HTML content for any links and stores them in an array. The contents of this message contain different URLs, so we need to iterate through the array using the find method. Here, we're looking for a link that contains the term password_reset in the URL, since this is the link we need.
Once we find the unique password reset link, we tell TestCafe to navigate to that URL. This command loads the page to allow the user to set a new account password. The test proceeds to fill the form with a new password. After submitting this form, we validate that we have an alert indicating the password reset process was successful.
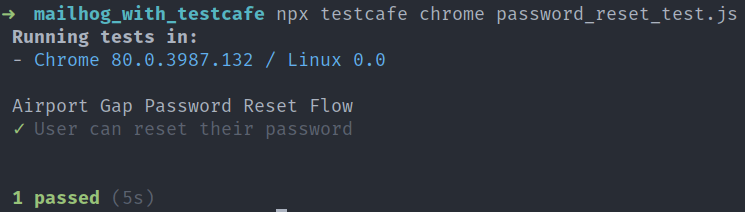
We can now run our new test with the same command as the previous test, this time specifying the new file:
npx testcafe chrome sign_up_test.jsOnce again, this command opens up Google Chrome and goes through the entire password reset flow from beginning to end.
There's no longer any need to spend time checking emails manually and clicking through the links. This kind of test is an excellent example to show the power of these tools in freeing up tons of manual testing time.
Drawbacks of MailHog
Hopefully, these tests demonstrate how helpful MailHog is when it comes to automating email testing. However, MailHog has a few downsides compared to a hosted service like Mailosaur. These issues may be dealbreakers for you and your team to adopt MailHog into your testing pipeline.
Lack of updates
While MailHog works well enough for the scenarios similar to those shown in this article, the tool hasn't received an update for a few years. The latest version of MailHog is from three years ago, and there's no sign of the tool getting updated any time soon. If you encounter any scenarios where MailHog doesn't work for your use case, you're out of luck.
Poor documentation
There's a lack of decent documentation for MailHog. There's barely enough to configure the tool and start using it. In general, you don't need much documentation to get the service working. But for other crucial functionality like accessing the API, there's limited, poorly-structured documentation. Combined with the lack of updates, we probably won't see any improvements in this area soon.
Limited functionality
MailHog works exceptionally well if all you need are the basics of receiving and retrieving emails during development and testing. It also has additional functions that weren't discussed in this article, like authentication and passing a message to a real SMTP server. But there are a few bits of functionality that are missing compared to a hosted service like Mailosaur, such as creating separate servers and mailboxes for different applications and performing spam tests.
Summary
If you have an application that sends emails to your users, you need to ensure they're working correctly. Often, teams perform these tests manually, which take up plenty of time and are prone to having bugs slip by QA. Automating your email testing can save a lot of time and money by having your testing tools take care of this work. You don't need to waste time triggering emails, opening them, and clicking through links.
Hosted services are excellent for handling your emails during testing, but they can get expensive, especially for smaller teams. You also don't know how the companies behind these services handle your data. Thankfully, there are alternatives if price and privacy are important to you. MailHog is a free, open-source application that provides similar functionality than a paid service. All you need is to download MailHog, set it up, and have your application send emails to your server.
While MailHog works great in more straightforward scenarios like receiving messages and allowing you to retrieve them easily during testing, it also has a few potential dealbreakers. MailHog hasn't had an update in years, it has some missing functionality your team might need, and documentation is deficient. There's very little activity for the project as well, so chances are these issues won't get fixed any time soon.
Still, if you need a cheap and self-hosted solution for automating your email testing and can overlook the lack of updates and documentation, MailHog is a suitable alternative to a pricier email testing solution. It can help free up your team from the tedious work of manually checking emails, ensuring your primary line of communication to your users is working as you expect.
Have you found any other services like MailHog that help you with emails during testing? Leave a comment below, and I'll share it with others by adding it to this article!
Want to boost your automation testing skills?
With the End-to-End Testing with TestCafe book, you'll learn how to use TestCafe to write robust end-to-end tests and improve the quality of your code, boost your confidence in your work, and deliver faster with less bugs.
Enter your email address below to receive the first three chapters of the End-to-End Testing with TestCafe book for free and a discount not available anywhere else.