During the exploratory testing phase for web applications, it's essential to keep an eye out for UI changes. But with all the different ways to display your app on different browsers, devices, and resolutions, how can you ensure that you're safely catching changes on an application's front-end without the mundane work it entails? Thankfully, you can automate visual testing in your current workflow.
Visual testing is tedious and error-prone work. Still, it's a vital form of testing, as UI issues are one of the primary sources of bugs slipping by QA and into production. Often, testing teams perform this type of testing manually. The team compares an interface between two points, like staging vs. production, and notes any changes. Unfortunately, this way of testing is time-consuming, and since testers are human, it's easy for issues to slip by.
Have you ever played one of those "Spot The Difference" games where you have two seemingly identical pictures, but there are a few differences between them? That's how it feels when most teams perform visual testing. Sometimes, the changes are obvious to spot. Other times, the changes aren't apparent at first glance and pass undetected until it's too late.
Often, unexpected visual changes are a minor annoyance, like an image getting resized larger than expected, for instance. But sometimes they can hurt your app's functionality, like that resized image covering a critical call to action by accident.
Unfortunately, despite our best efforts, it's easy for unexpected changes to slip by. As testers, we often have to juggle lots of responsibilities simultaneously. If a visual difference isn't evident from the start, it increases the chance that the change may have an adverse effect. It gets more complicated when your test matrix grows - validating the UI on different browsers and devices expands the amount of testing significantly.
What is automated visual testing?
Implementing visual testing tools to detect UI changes automatically is useful to free up your time for other testing activities. We have lots of visual testing tools at our disposal that handle the bulk of this work. These tools process your application's interface and can automatically detect UI changes immediately.
Automated visual testing helps by hooking up to your current testing workflow to capture a snapshot of a page under test and perform comparisons between the present change and a baseline. The tool catches any modifications made to the interface during your automated test runs and lets your team know about it almost instantly.
From here, the team can review the change. If it's an expected change, the team can move along. If the change is unexpected, the team catches it before the change goes out to production. No one needs to spend time combing through pages
Automated visual testing is crucial because it helps find serious UI issues quickly before your changes go live. You don't want your users finding your visual bugs for you. The earlier you find bugs, the easier it is to correct. It also helps your team skip the dull manual work of having to keep an eye out for UI changes, among the other things they have to test.
Handling automated visual testing with Percy
One of the better-known tools for automated visual testing is Percy.
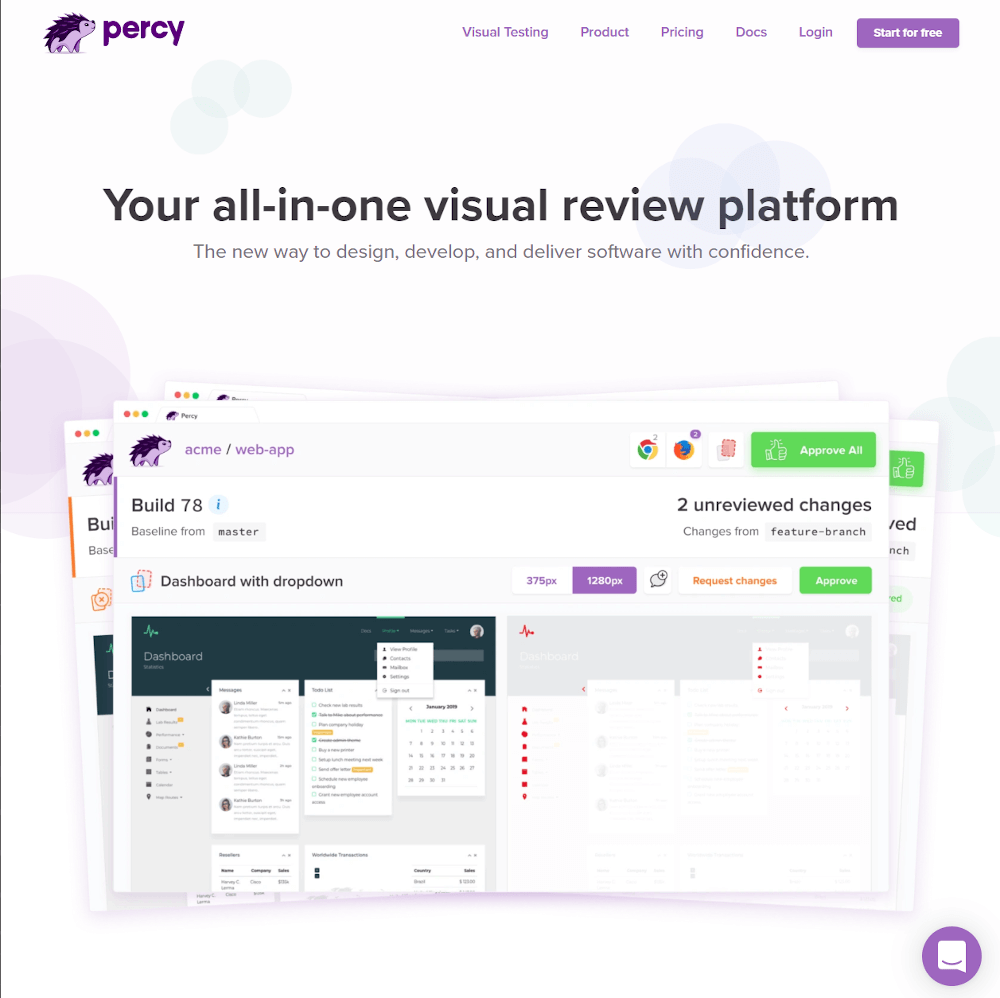
Percy is a service that hooks into your existing tests and collects snapshots of your web application. Once it receives a snapshot, it performs visual comparisons of the image against a baseline snapshot. It handles the heavy lifting of spotting any change for your application's interface. The service also processes your snapshots in different widths, making it dead-simple to verify responsiveness in your application.
The service does more than collect and process snapshots. You can configure Percy on how you want to handle any changes it detects. For instance, you can receive alerts through communication mediums like email or Slack. Also, you can set up Percy to integrate with other services like GitHub to alert and even block code from getting merged until someone approves of a detected change. If you need something a bit more customized for your team, you can have Percy send events via webhooks.
You can also use Percy to do some cross-browser visual testing. However, current browser support is limited to Google Chrome and Mozilla Firefox, which is one of the drawbacks of the service. If you need to perform visual testing against other browsers like Microsoft Edge, you'll have to wait for Percy to add support.
Automating visual testing with Percy and TestCafe
One of the best things about most visual testing tools is that they work for just about any modern test stack. It makes integration painless with what you're currently using, and you won't spend time learning or setting up a new environment. You can use your current workflow with no issues.
For the remainder of this article, I'll show how Percy integrates with the TestCafe testing framework. The article covers:
- How to set up Percy with an existing TestCafe test suite.
- How to take a snapshot and send it to Percy.
- See how Percy processes snapshots and how to handle visual changes when they occur.
As a starting point, we'll use the code built in a previous Dev Tester article covering how to get started with TestCafe. If you're new to TestCafe, you can follow along with that article, or you get the source code on GitHub. These tests run against a staging site built for Airport Gap, a small project I developed to help others improve their API automation testing skills.
If you want to follow along with this article and test locally, you also need an active Percy account. Percy has a free tier with some limitations. You can process up to 5,000 snapshots per month, and you have a limit of 10 team members for the account. The free tier is enough to get started and get a good sense of how the service works.
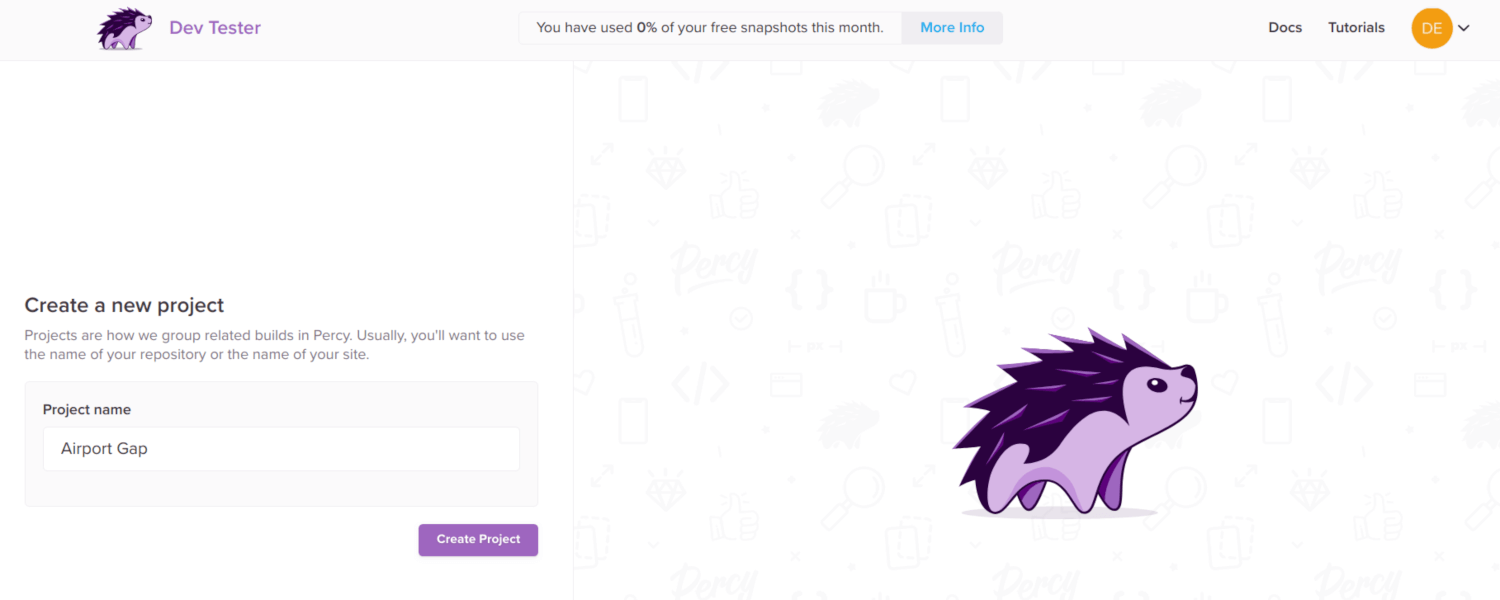
When you have your Percy account available, you need to set up a new project. All you need at the beginning is your project name.
After creating the project, Percy provides a token that's unique for your project. When running your tests, you need to set up this token, so Percy knows which project it needs to use to process your snapshots. You can set up the token with the PERCY_TOKEN environment variable. The Percy documentation explains how to set it up on your specific environment.
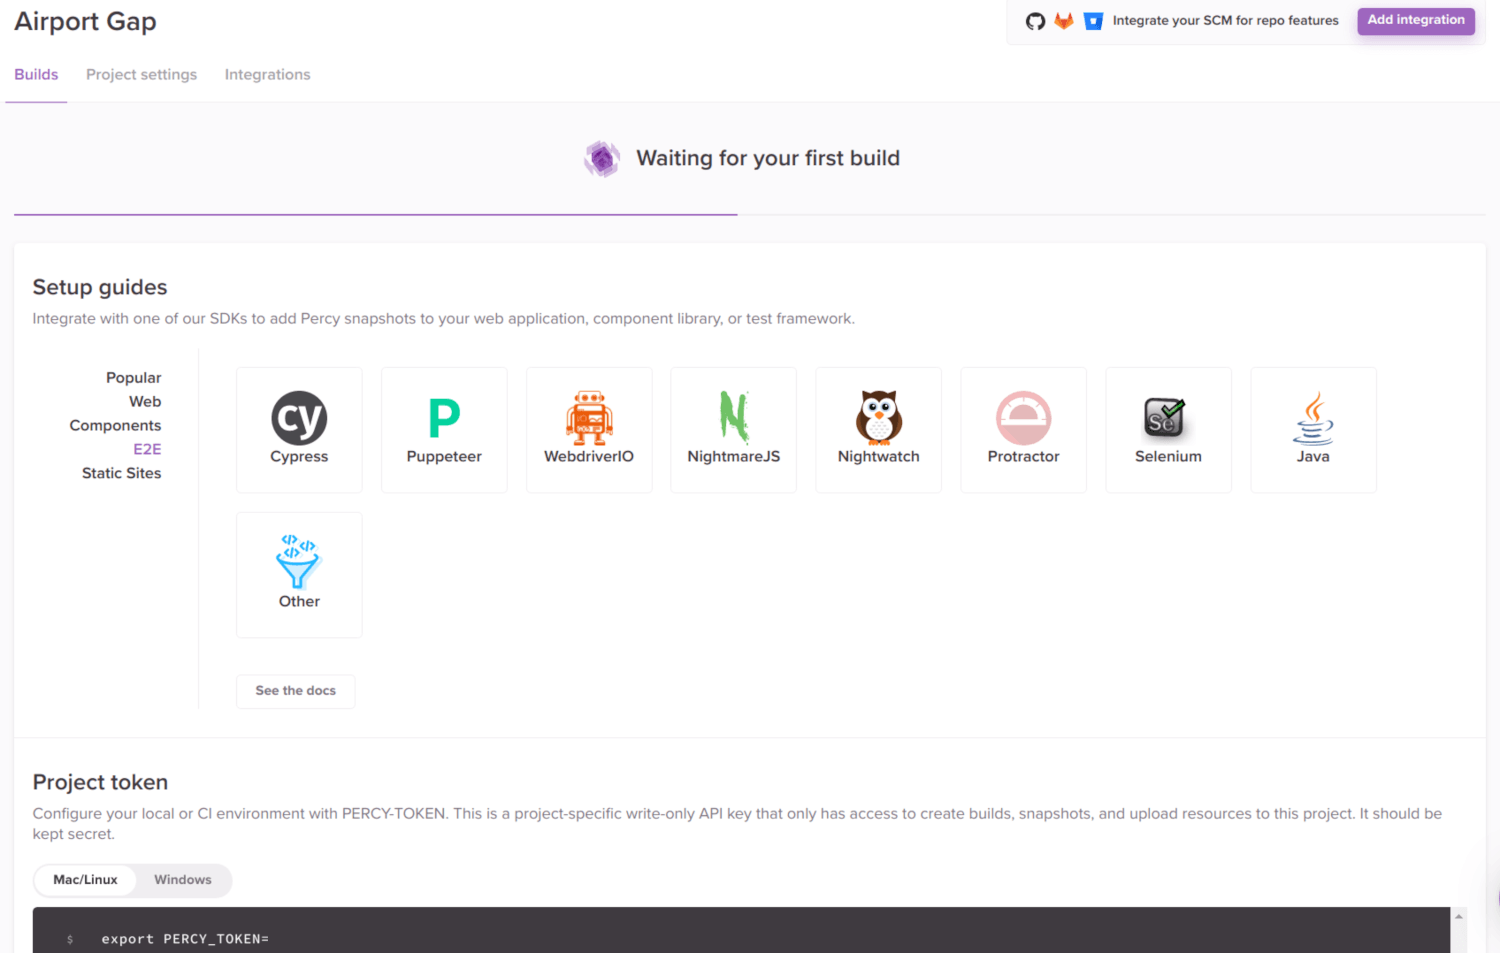
Now you can focus on setting up your TestCafe test suite to use Percy. The first step is to install the Percy TestCafe library. In the project directory, you can install it by running npm install @percy/testcafe.
An important note to make here is that Percy relies on Puppeteer to perform some of its tasks. When installing the @percy/testcafe library, Puppeteer gets installed as a dependency, which in turn downloads an instance of Chromium to ensure it works with Puppeteer's API. However, it's a hefty download (~170 MB on Mac, ~280 MB on Linux and Windows). I'd recommend allowing the download, but you can bypass it and use your current instance of Chromium/Chrome.
With the Percy TestCafe library installed, you can begin using Percy with your existing tests. Let's run our first automated visual test. Open the home_page.js test in the TestCafe project and modify the file to include the necessary code to perform the test:
import percySnapshot from "@percy/testcafe";

import homePageModel from "./page_models/home_page_model";

fixture("Airport Gap Home Page").page(
  "https://airportgap-staging.dev-tester.com/"
);

test("Home page snapshot", async t => {
  await percySnapshot(t, "Home page");
});

test("Verify home page loads properly", async t => {
  await t.expect(homePageModel.subtitleHeader.exists).ok();
});
There are two changes to the existing test. First, you have to import the Percy TestCafe library with import percySnapshot from "@percy/testcafe"; at the beginning of the code. It allows us to integrate with Percy via the percySnapshot function, used later in the test.
The other change is our visual test. The new test, titled "Home page snapshot," does what the title says. Using the percySnapshot function, Percy takes a snapshot of the current page under test - in this case, the Airport Gap home page in the staging environment - and sends it over to their servers.
The percySnapshot function takes two parameters - the TestCafe test controller, and a required string to identify the snapshot. You can pass an object as an optional third parameter for additional configuration like modifying request headers or specifying page widths for different snapshots.
If you notice, the test contains no assertions. All it does is take the requested snapshot and send it to Percy for processing. Since there are no assertions, it means the test won't pass or fail directly from our test run. The reason is that processing your snapshots is done asynchronously on Percy's servers. When the processing completes, Percy performs what it needs, like sending alerts and webhooks.
We can now run the test. Running the test is slightly different than a regular TestCafe test. For the test to hook up with Percy, it needs to use Percy's command-line client. The client gets installed as part of the @percy/testcafe library, so there's no need to set it up manually. However, you do need to wrap your test command with Percy's client:
npx percy exec -- npx testcafe chrome home_test.jsWe're using npx here since we installed both TestCafe and the Percy libraries in the current directory. npx uses the locally installed version to execute these commands.
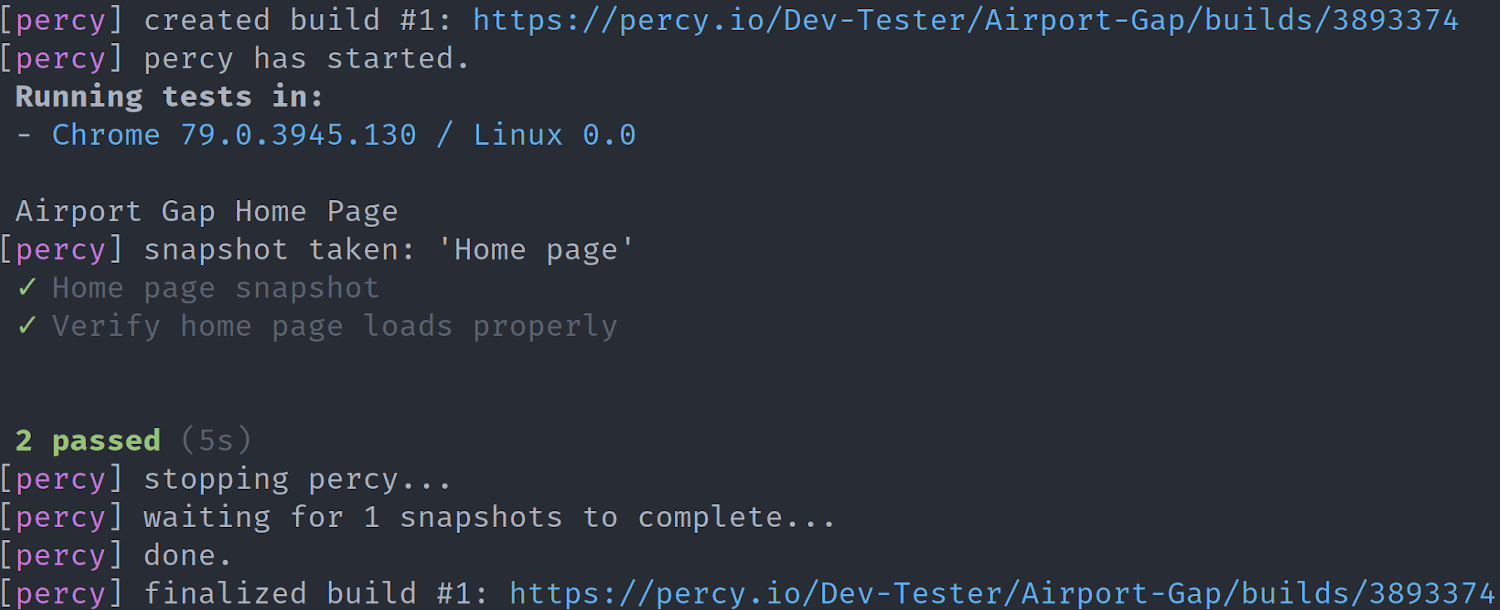
If everything correctly set up, the test will use Percy's command-line client to take a snapshot of the current page and submit it to their servers automatically. TestCafe prints out some information indicating that our snapshot was taken and sent to Percy's servers. It returns the URL of the test, where you can see the snapshot and its comparison.
In this example, there's nothing to see besides the snapshot taken by Percy. The first time you take a snapshot of a page, this image will serve as your baseline for that snapshot, as identified by the percySnapshot parameter. Percy compares future snapshots from this page against the baseline.
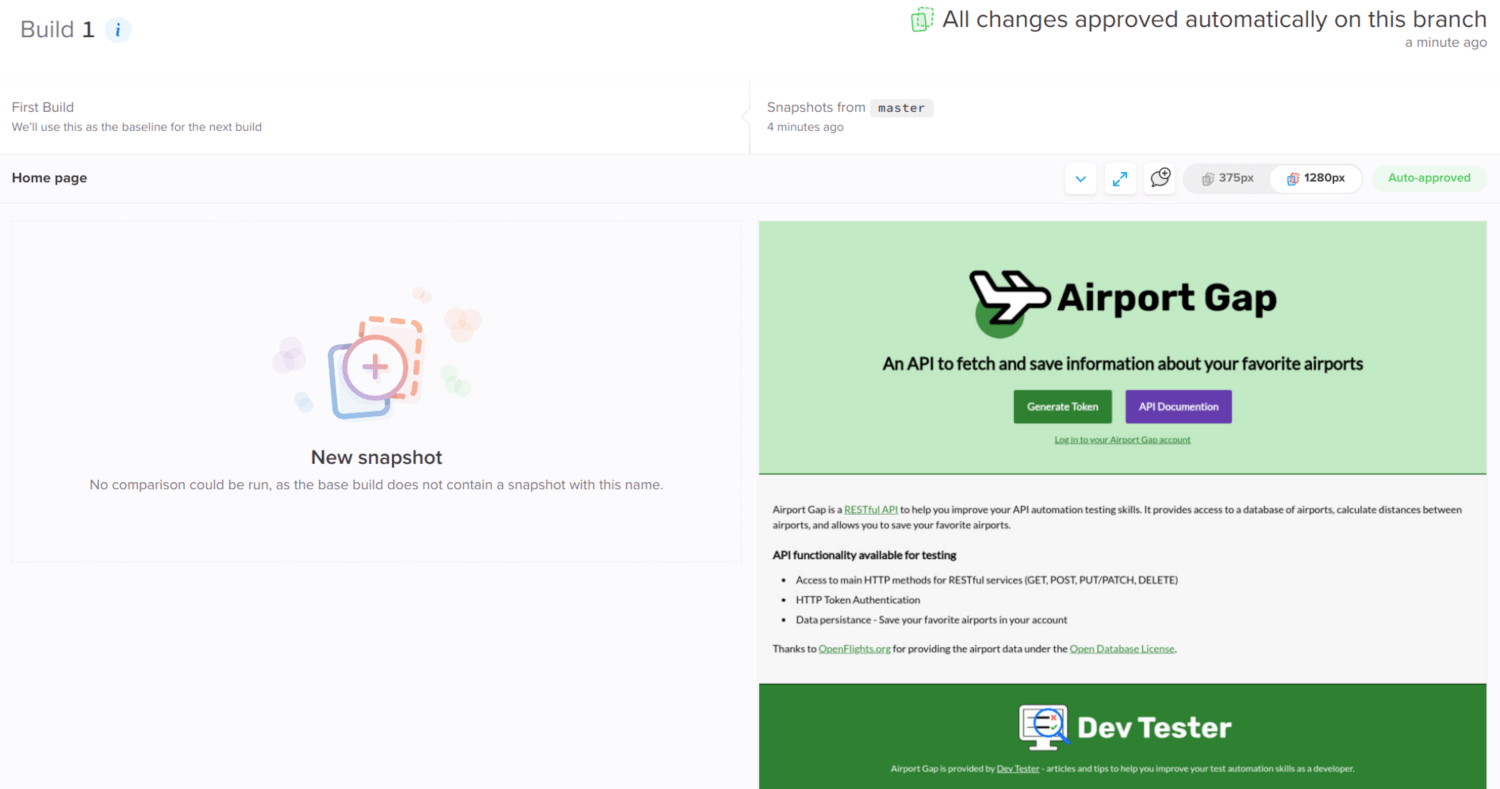
Every time you run this test, Percy processes the snapshot and compares it to the baseline. If there are no visual changes, Percy marks the snapshot as verified and won't flag any changes. Your baseline image for this page remains the same through subsequent test runs.

If you didn't set up your Percy token correctly or there's an issue with your setup, your tests continue to run without failures, but you'll see the following error message:
[percy] Error posting snapshot to agent, disabling PercyMake sure you set the PERCY_TOKEN environment variable properly and install the @percy/testcafe library properly for your environment.
Handling visual changes
To demonstrate how Percy detects and handles visual changes, I'll make a few updates to the Airport Gap home page. I'll make a few larger, explicit changes:
- Make the Airport Gap logo smaller
- Make the subtitle underneath the logo larger
- Change the "Generate Token" button text to something else
- Make the "API Documentation" button color slightly darker
After making these changes, let's rerun the same test. Just like it did before, Percy takes the snapshot of the home page and submits it to its servers. Let's open the new build and see what happened:
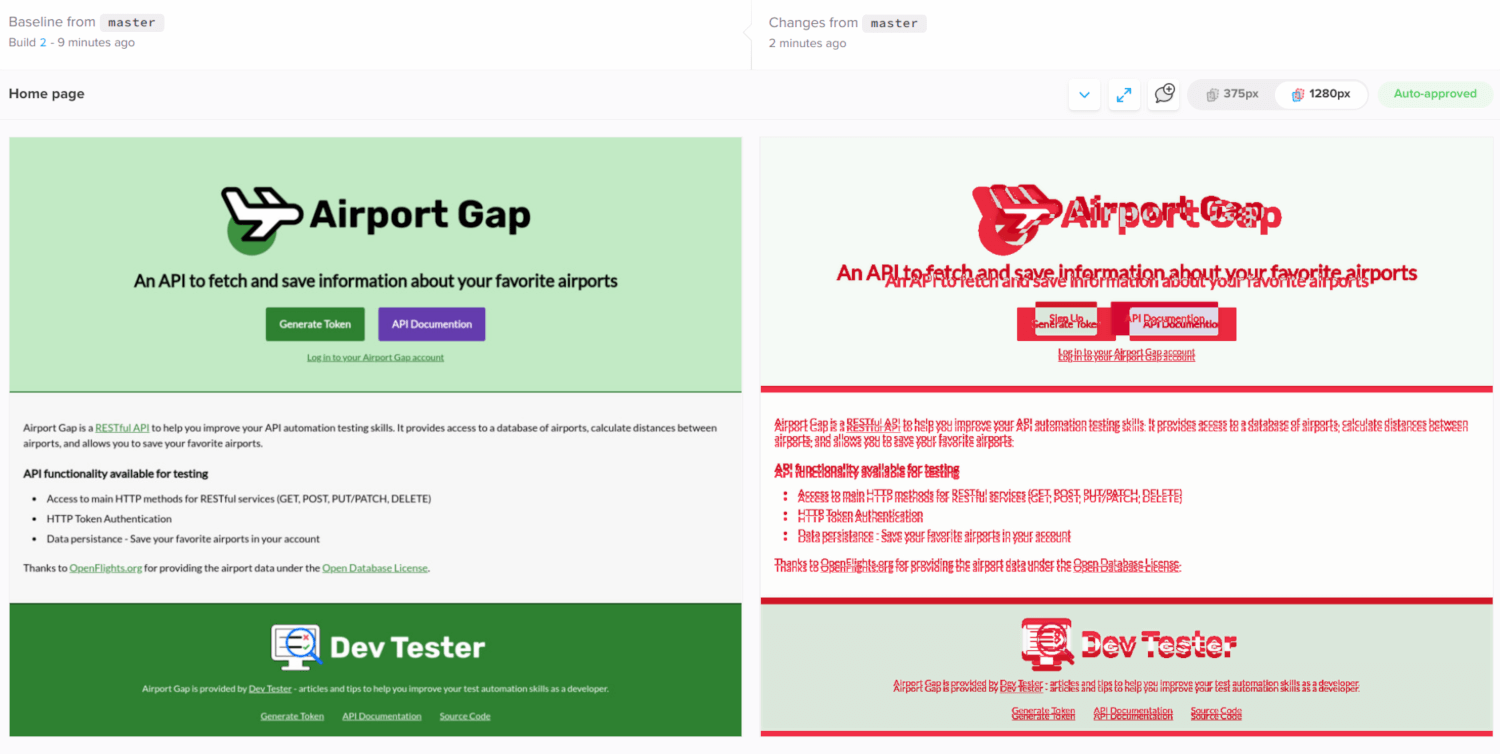
Here, you can see the home page changed quite a lot, and Percy detected the changes. Everything red on the snapshot indicates a visual difference from the baseline. Since I changed the size of some elements at the beginning, it shifted the rest of the page. That's why the current snapshot has a lot of marked changes.
Also, note in this example that Percy automatically approved these changes. This behavior is due to the project using its default settings. By default, Percy auto-approves changes from the master branch of our code repository. Since I made these changes locally from the master branch, the changes got automatically approved, and these changes became the home page's new baseline.
In most cases, you don't want Percy to approve changes to your baseline automatically. For most common development workflows, team members won't work directly on the master branch, so this isn't an issue. For this example, let's ensure that no changes are auto-approved. You can do this by going to the Project Settings tab in Percy and clearing the Auto-approve branches field under the branch settings section.
The changes I made to the home page are a valid example of how visual testing detects changes quickly. But the example above isn't a particularly useful one. Since the UI changed quite a bit, those changes would have been easy to spot by anyone doing some form of manual testing.
Let's make some smaller changes to show something a bit easier to miss. I'll revert some of the previous changes:
- Restore the original text for the "Generate Token" button.
- Revert the color for the "API Documentation" button.
Rerun the test and open the new build on Percy. Since we configured the project to never auto-approve changes, this time, we receive an alert that we have some changes that need a review.
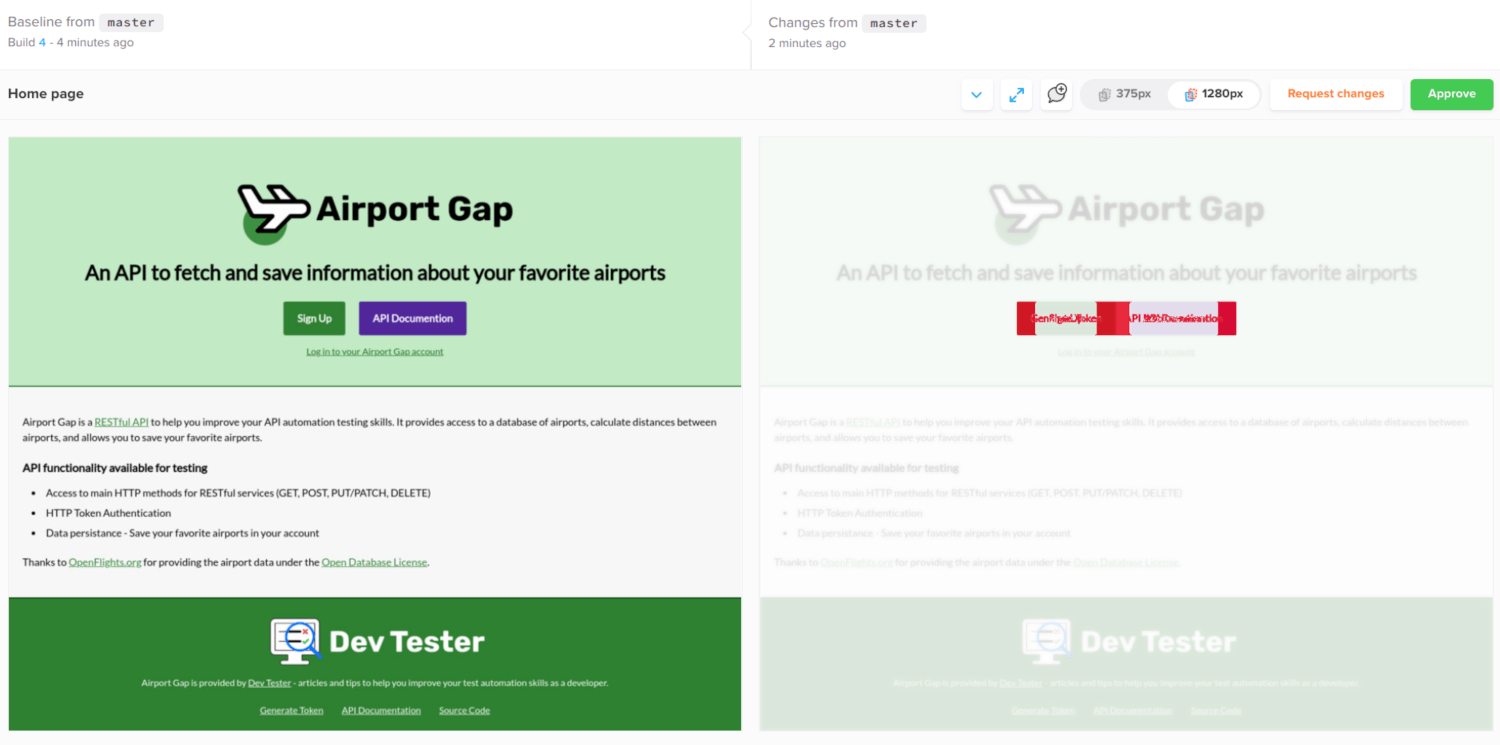
This example gives you a better idea of how a visual testing tool like Percy helps with minor details. The changes detected by Percy are now smaller, isolated to the area where the buttons are. Additionally, you and your team now have an opportunity to check what happened.
What to do when visual changes happen?
For this article, we ran these examples in our local environment. In practice, running automated visual testing locally isn't useful. You'll get the most out of automated visual testing by running these tests as part of a continuous integration pipeline. Percy supports most common continuous integration providers, making this integration a snap.
Running visual testing alongside with the rest of your build significantly reduces the risk of undetected UI changes going through to your users. Once you set up your pipeline, you don't have to worry about manually verifying your application's interface. You and your team are free to perform other valuable tests.
If your development team's workflow includes working on feature branches before merging to the main branch, configure Percy to work with your source code management tool. Percy can send automatic updates to your code repository to indicate if visual changes occurred in a branch or someone requested a change. You can even block the branch from getting merged in until the team approves it.
Handling visual changes shouldn't be the responsibility of testers or developers only. Get other stakeholders on the project involved in the process quickly by configuring Percy to send appropriate alerts to the right people. This way, QA and development don't have to spend time relaying their findings to others like the product team.
Summary
Visual testing of web applications is an essential part of a healthy test lifecycle. But it's tedious work, prone to mistakes and unnoticed changes. You can automate visual testing into your current stack, no matter your existing workflow.
This article demonstrated how simple it is to use the Percy visual testing service with an existing TestCafe test suite locally. You can integrate it with any other testing framework and continuous integration service. It doesn't matter if you use Selenium or Cypress for testing, or if you use CircleCI or Jenkins for continuous integration. Percy slots right in without getting in the way.
Tools like Percy make it simple to detect visual changes automatically. Your team doesn't have to spend time combing through your application and keep track of interface changes. Percy handles the work, along with putting alerts and checks in place to ensure the team catches any UI issues immediately. Use these services to your advantage to get others involved and prevent unexpected changes from getting into the hands of your users.
Does your team perform automated visual testing? If not, what's preventing the team from implementing this kind of testing? Leave a comment below and share your experiences!
Want to boost your automation testing skills?
With the End-to-End Testing with TestCafe book, you'll learn how to use TestCafe to write robust end-to-end tests and improve the quality of your code, boost your confidence in your work, and deliver faster with less bugs.
Enter your email address below to receive the first three chapters of the End-to-End Testing with TestCafe book for free and a discount not available anywhere else.


