You don't need to be an experienced software developer to create an automated test suite for web applications. These days, there are plenty of tools that allow testers to create tests without touching any code directly. These tools allow you to run your web application and record a series of steps so you can replay them automatically.
These test recorders are excellent to get started with automating a suite of regression tests. It's especially useful if you or your testing team doesn't have the technical know-how yet to write automated tests through code.
However, test recording tools also have a bit of a reputation of not working as well as coding up the tests. I have had previous experience with test recorders that led me to think this way for a long time.
It's been a few years since I last used a test recorder to create automated tests. I was curious how some of these tools evolved since then, so I decided to revisit this topic and see how test recording tools work nowadays.
My experience with test recorders
About six years ago, the company I worked for had an outsourced team in charge of QA of one of our new web applications. The team did not have any software developers, so they used Selenium IDE to create the initial suite of end-to-end tests.
It was a quick and easy way to get these tests up and running. For a few weeks, the tests worked well. We hooked them up to our in-house continuous integration system, and they ran with no issues. The outsourced team continued to expand the test suite using the test recorder.
As our web application grew in scale and complexity, though, the cracks in the test recording tool began to show.
Many of the issues we had didn't relate to the recording tool itself. Often, it was Selenium giving us trouble, such as dealing with asynchronous responses in the application. But the team quickly reached limitations with the tool since it didn't provide fine-grained control over the tests. The team could only use what Selenium IDE provided, which was limiting our effectiveness.
Stuck with a half-baked test suite that was continually breaking, and a suite we couldn't fix properly, we abandoned Selenium IDE. Since then, I haven't even looked at a test recording tool for my tests.
TestCafe Studio: A better test recorder?
Ever since I discovered TestCafe for writing end-to-end tests, I have used it for most of my web projects. It's served me very well, and I have had few issues with the tool. It's a vast improvement over my past experiences with Selenium and especially Selenium IDE.
I know that TestCafe has a test recording tool of its own, TestCafe Studio. It's an IDE for visually creating automated tests without having to code your tests, just like Selenium IDE. The tool uses its own engine under the hood. But as opposed to the TestCafe testing framework, TestCafe Studio is an annual subscription-based tool.
TestCafe Studio looks very useful as a test recording tool. However, I wasn't interested in the tool, even if it wasn't subscription-based. Since my career is mainly in software engineering, I'm most comfortable with diving into code. I like having the control to write my tests as I see fit.
However, I was fortunate to get access to a TestCafe Studio license for my personal use. Since I have access to use the tool now, I wanted to take it for a spin and see how test recording tools work nowadays.
Putting TestCafe Studio to use
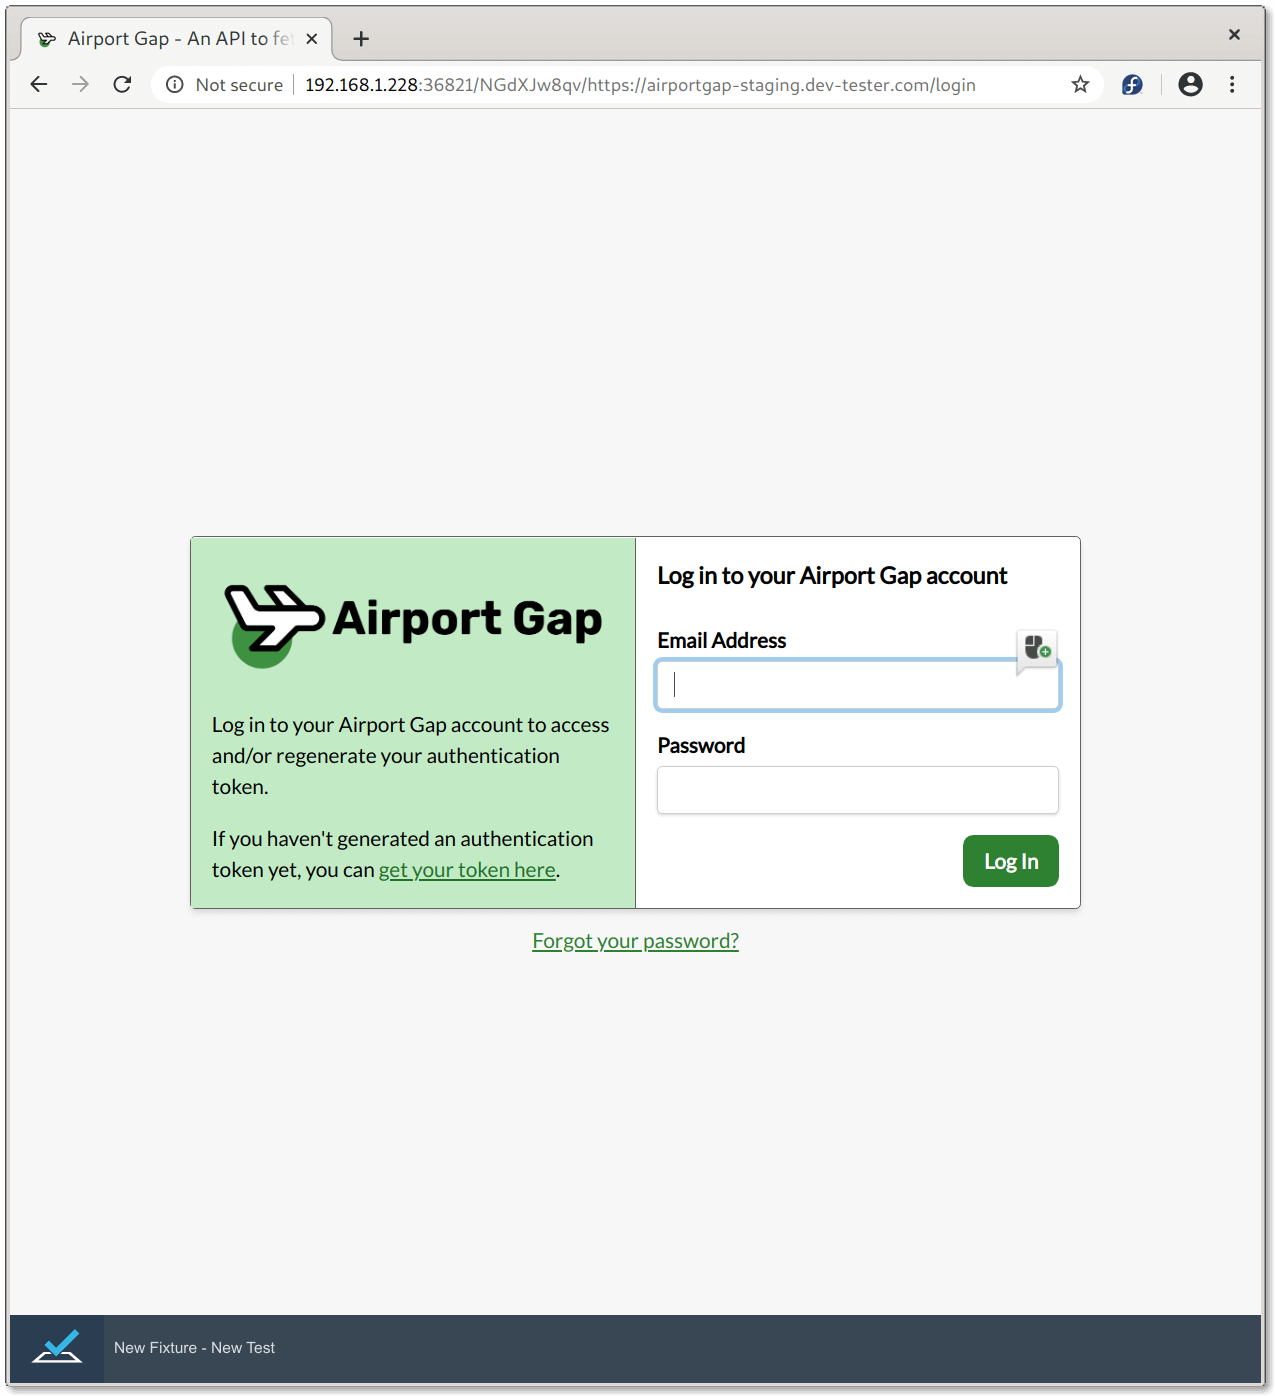
For my tests in this article, I'll use Airport Gap as the website under test. I have been using this website as an example for previous articles on TestCafe, such as How to Get Started with TestCafe.
Installing TestCafe Studio is straightforward. All we need is to do is download the installer and set it up. TestCafe Studio is available for Windows, Mac, and Linux systems, and they have a free 30-day trial to try it out first.
Once set up, fire up the application, and we're ready to create our first test. The main screen for TestCafe Studio opens with a spot to enter the URL of the website we want to test.

After entering the URL and clicking on the "Start recording a test" button, TestCafe Studio automatically launches a web browser and load your website. The browser that opens is the one specified in the "Record Browser" drop-down list at the top of the tools window.
Now we can see TestCafe Studio's test dashboard. For now, the test has nothing defined in it, but we'll change that soon.
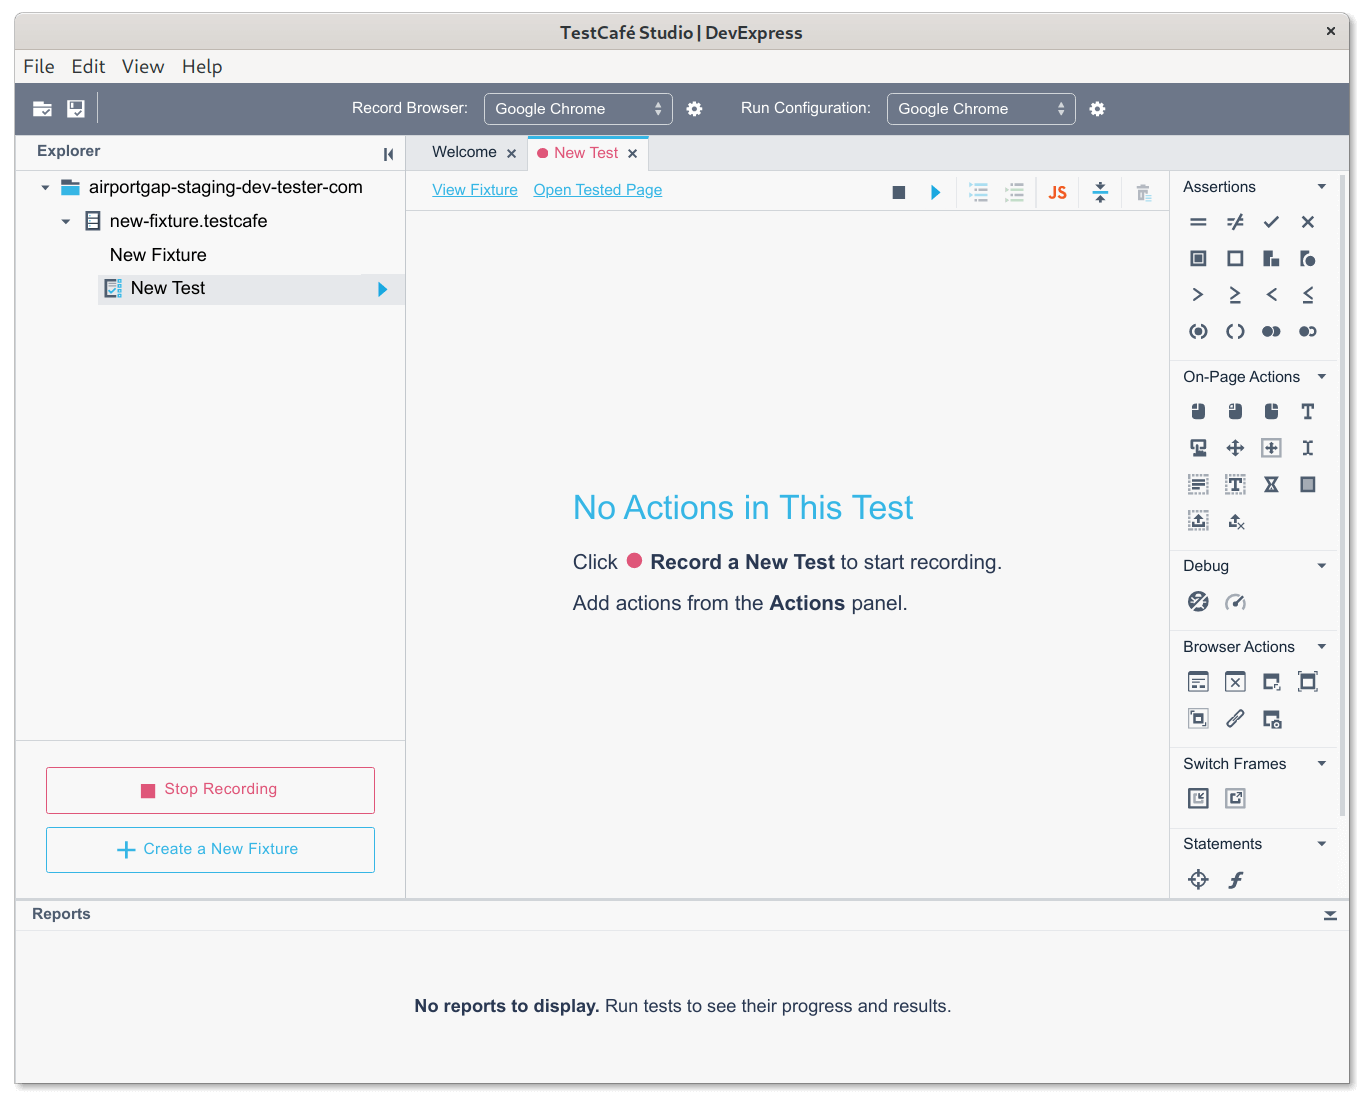
Now you can begin recording the actions you want to save for your test. All you need to do is perform the steps for the test you want to save in the browser window that TestCafe Studio opened, and the steps get recorded as you go through your application.
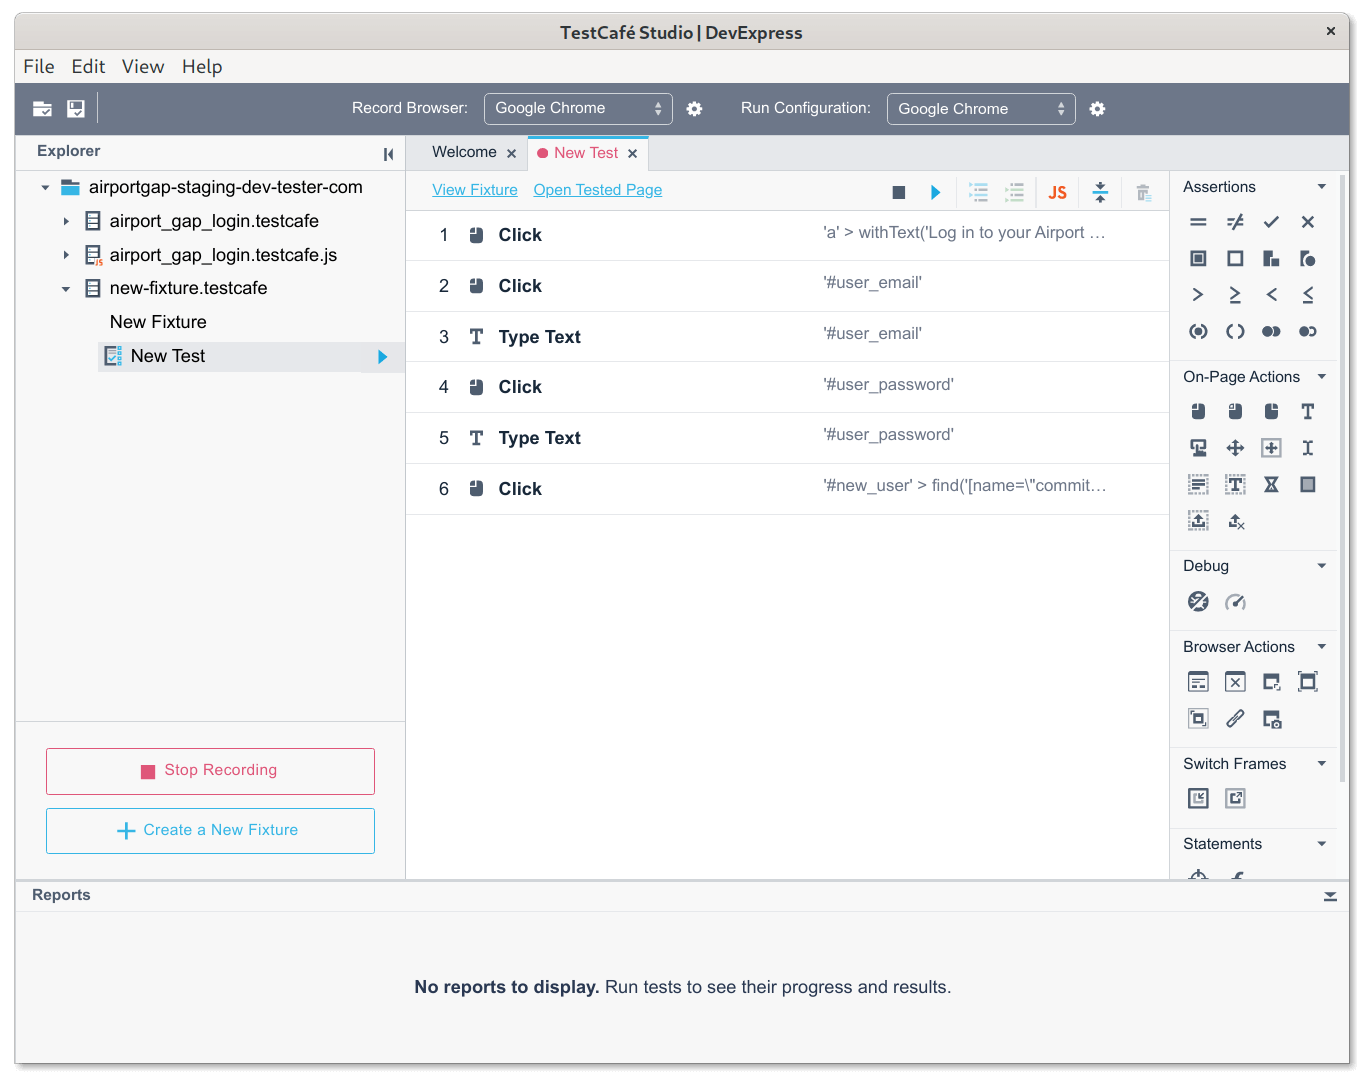
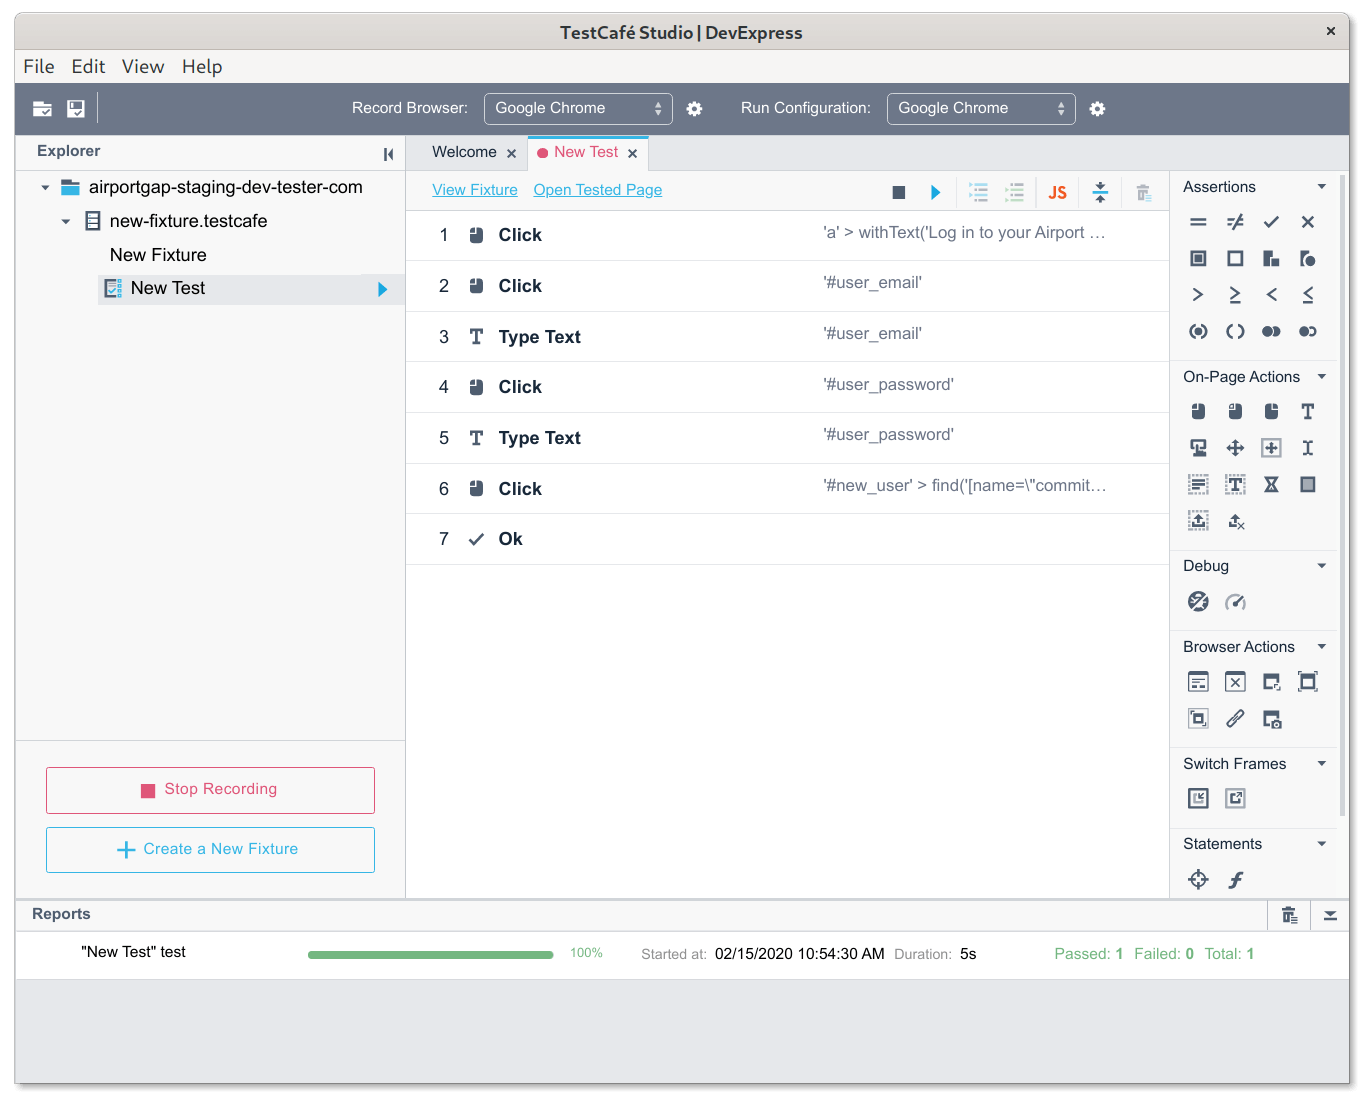
For instance, we want to record the actions needed to test that a user can log in successfully to the Airport Gap application. The first step from the home page is to click on the "Log in to your Airport Gap account" link. When clicking on the link, TestCafe Studio records a "Click" action on that specific element.
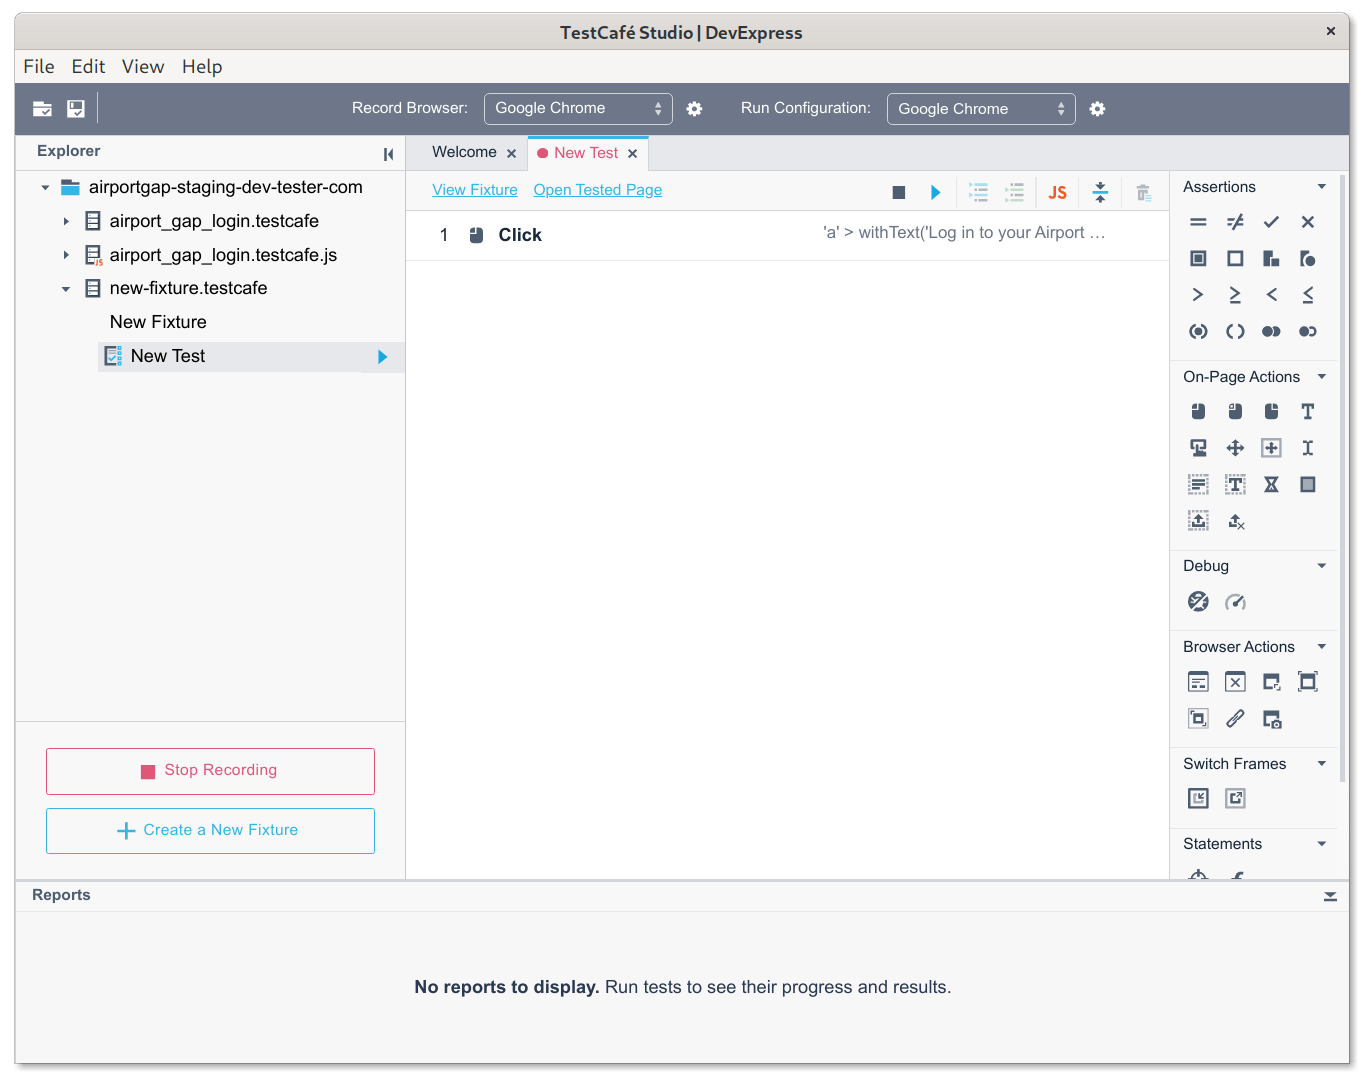
It registers that a click occurred on the current page on the specific element. Every time you click on something using TestCafe Studio, it shows up as an action in your test. Don't worry if you clicked on something accidentally. You can edit and delete any actions later.
After clicking the link and having it registered in TestCafe Studio, we'll get to the login form of Airport Gap. The next actions to take on this page are to click on the input fields, enter the data it needs, and click on the "Log In" button to submit the form.
However, TestCafe Studio treats the recording of form elements differently. When clicking on the Email Address text field, the "Click" action does not record immediately like it did when clicking on the link. Instead, a small mouse icon appears next to the form field, which you have to click to record the step. I believe this is to have more control over when you want a click to register (like after entering text).
Additionally, when you begin to type in the field, a cursor icon appears next to the text field. Clicking on this icon registers a "Type Text" action with the text inside the field. Only click on the icon when it contains the text you want to use when replaying your test.
After filling out the form while registering the necessary actions for clicking and typing, clicking on the "Log In" button registers another "Click" action for your test, and the test user logs in to the application. The recorded steps look like this:
Now we have all the steps to demonstrate the login functionality for the application. However, we still don't have any assertions to validate the test was successful. We need to add that step ourselves.
Adding assertions to a recorded test
To add an assertion, choose one of the assertions on the right-hand menu, under the "Assertions" section. TestCafe Studio provides different kinds of assertions in their API.
For our test, let's go with something simple. After a successful login on Airport Gap, we see an account information screen. A quick way to validate that our login was successful is checking for the account email on the screen. Let's verify that the element containing the email exists.
For this, we'll use the "Ok" assertion, which is the checkbox icon in the list of assertions in TestCafe Studio. After clicking on the assertion type, we have a new recorded step in the test, and we can configure the assertion.
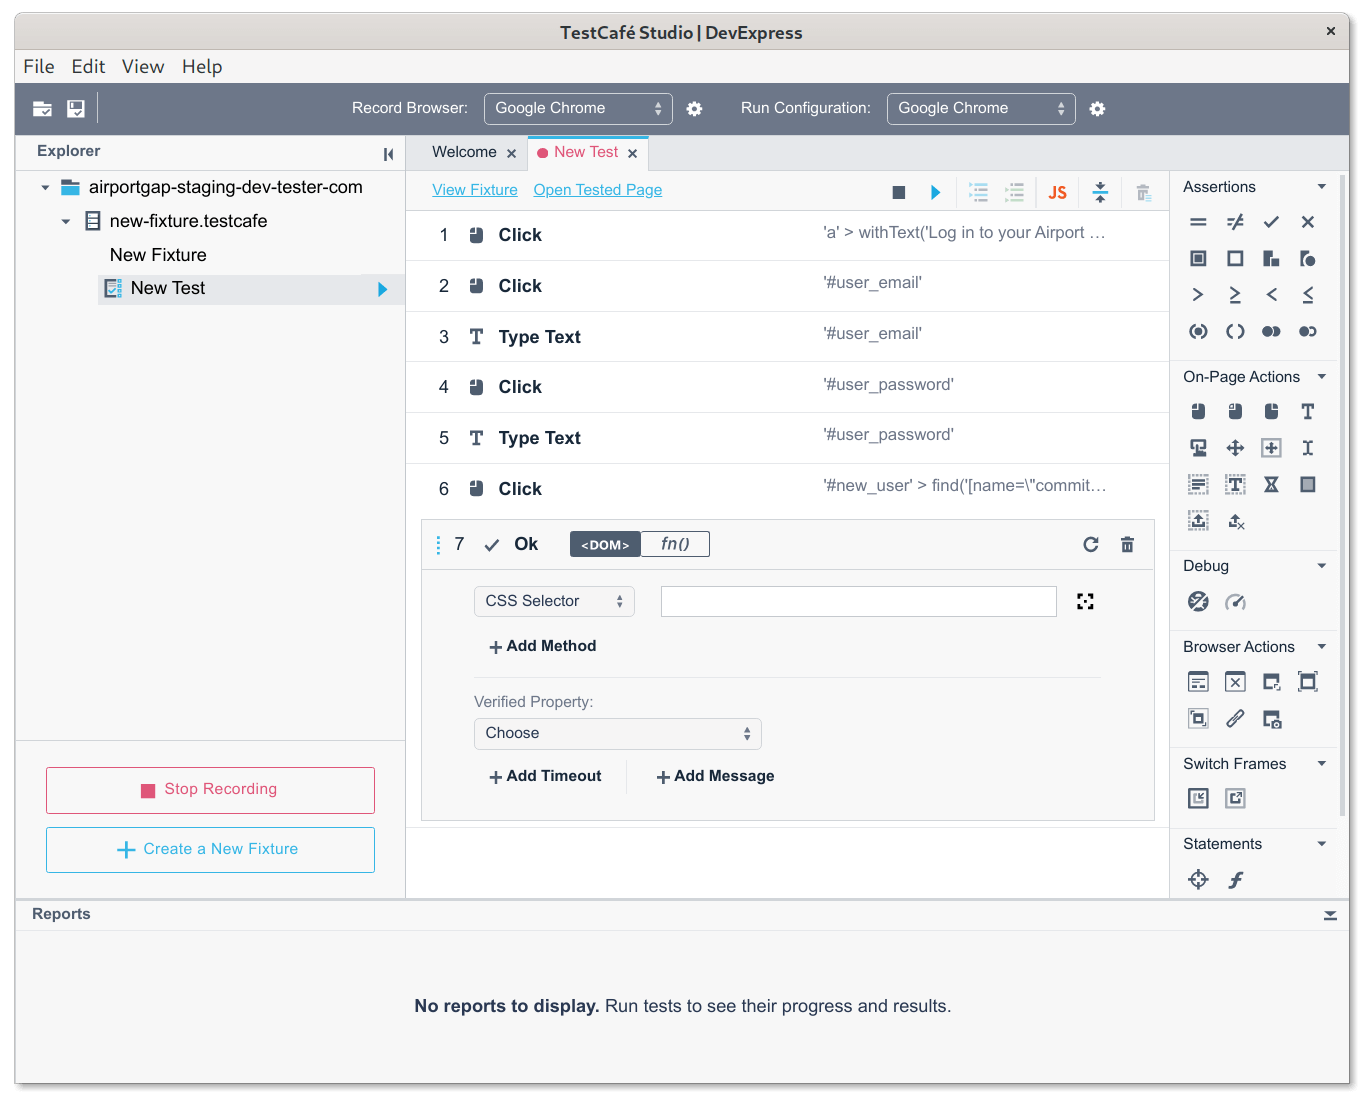
TestCafe Studio gives you a few ways to set up your assertion. Since all we want here is to check the existence of an element, we need to specify which element to target. We can either manually type the CSS selector, or click on the target icon and click on the element on the browser window to prefill the selector.
The next step is to tell TestCafe Studio what do we want to verify on the selected element. We can choose from a list of properties related to the element in the "Verified Property" drop-down list. This list automatically opens when selecting the element using the target icon.
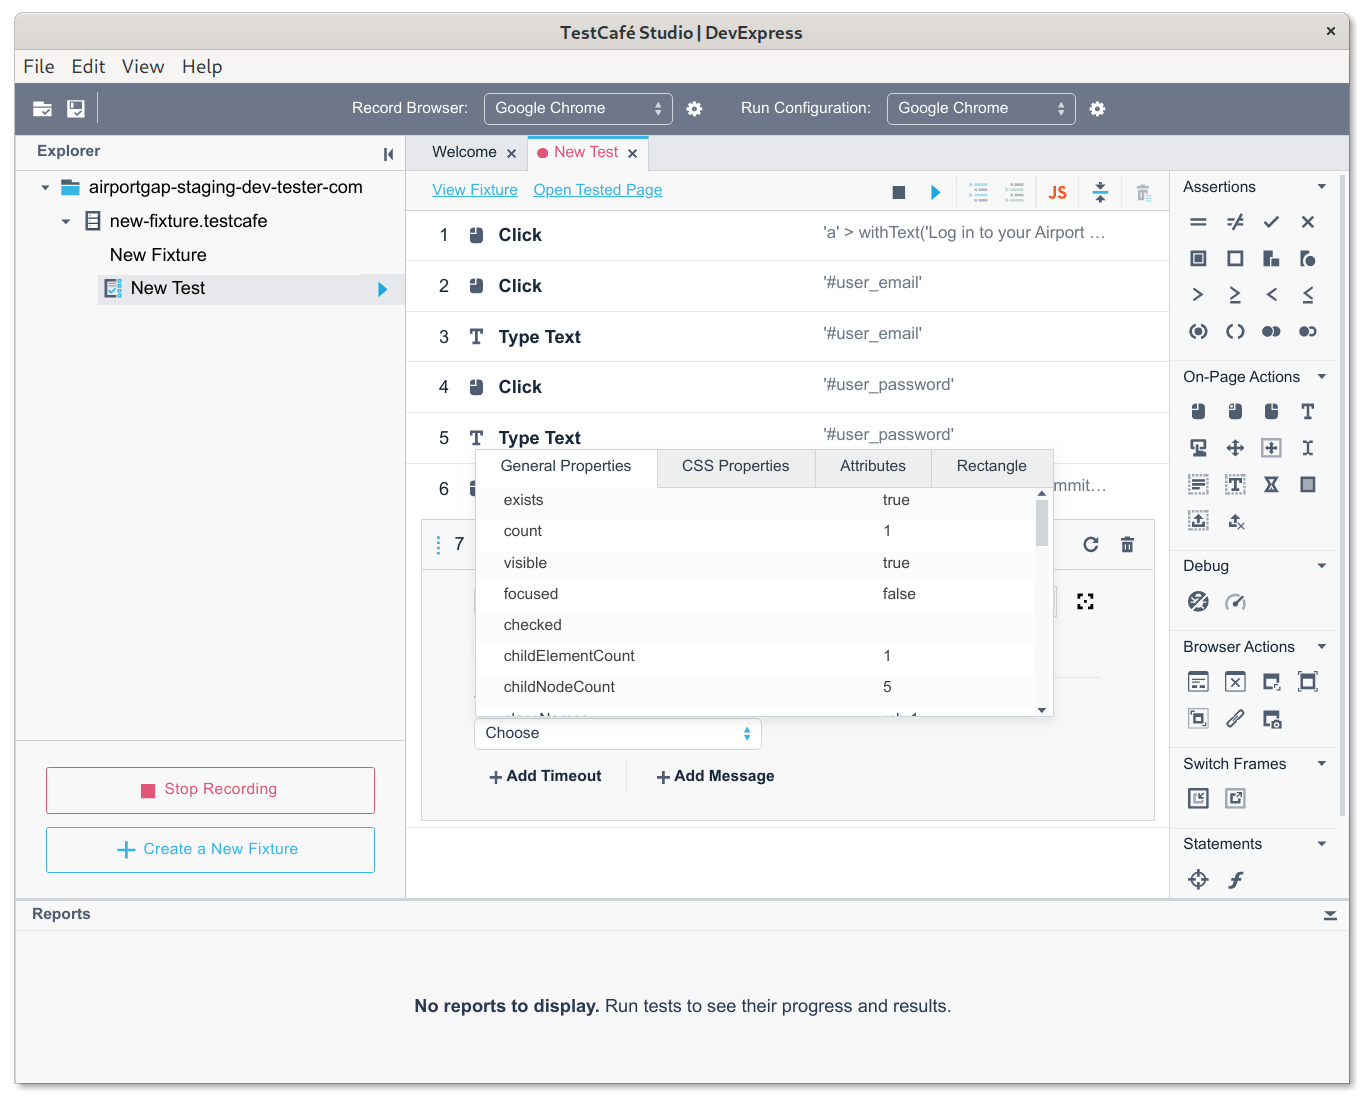
Here we can see the selected element's properties at the time when selected, like its contents, if it's disabled, and positioning. All we want is to know that the element is there, so we select the "exists: true" option.
That's all we need to validate our login test. To stop recording the test, click on the "Stop Recording" button on the left-side panel, or click the stop icon above the test. We now have our first recorded test.
Replaying a recorded test
To replay the test, all we need is to click on the play icon next to the test file name on the left-hand panel, or above the test. When you click on the icon to replay the test, the selected browser opens once again and goes through all the actions you recorded. If there aren't any issues running the recorded actions and assertions, you'll see your test results in the "Reports" panel at the bottom of TestCafe Studio.
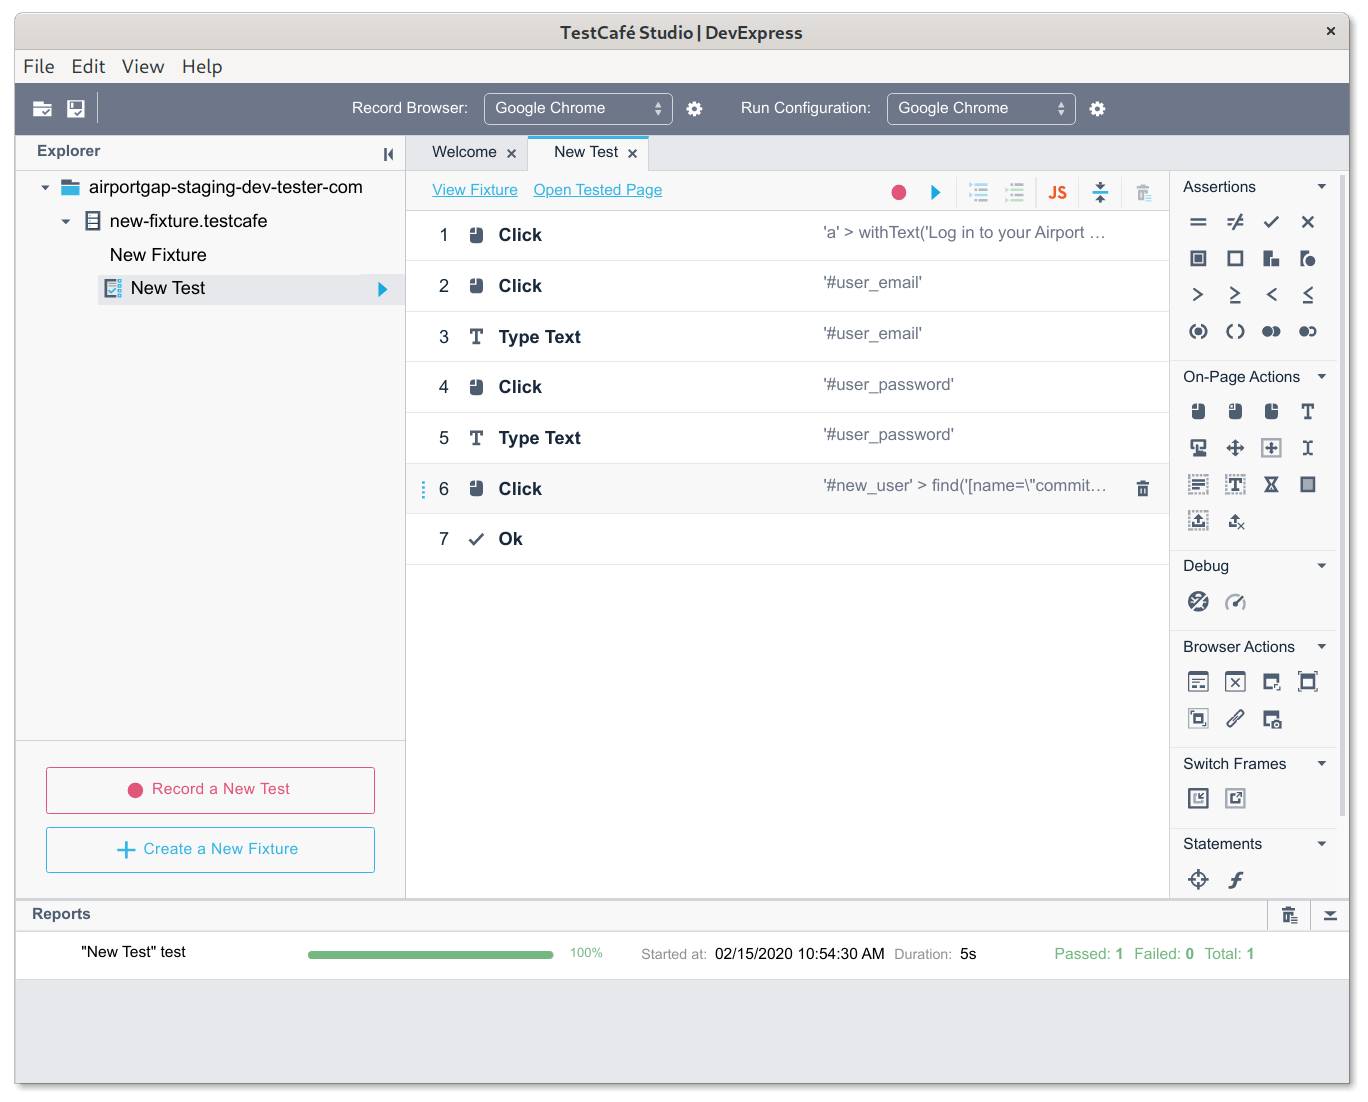
If an error occurs during the test run, don't fret! We don't have to re-record the entire test.
Fixing and updating existing tests
Sometimes we have other actions that snuck into the recorded test by accident, or we need to reorder our actions. Or after replaying a test, we realize our assertion is slightly incorrect, and we need to update the verified property. Here are some common ways to fix these issues.
Deleting a step
Deleting a step in a test is simple. Just hover over the step to delete, and click on the trash can icon that appears next to the step.
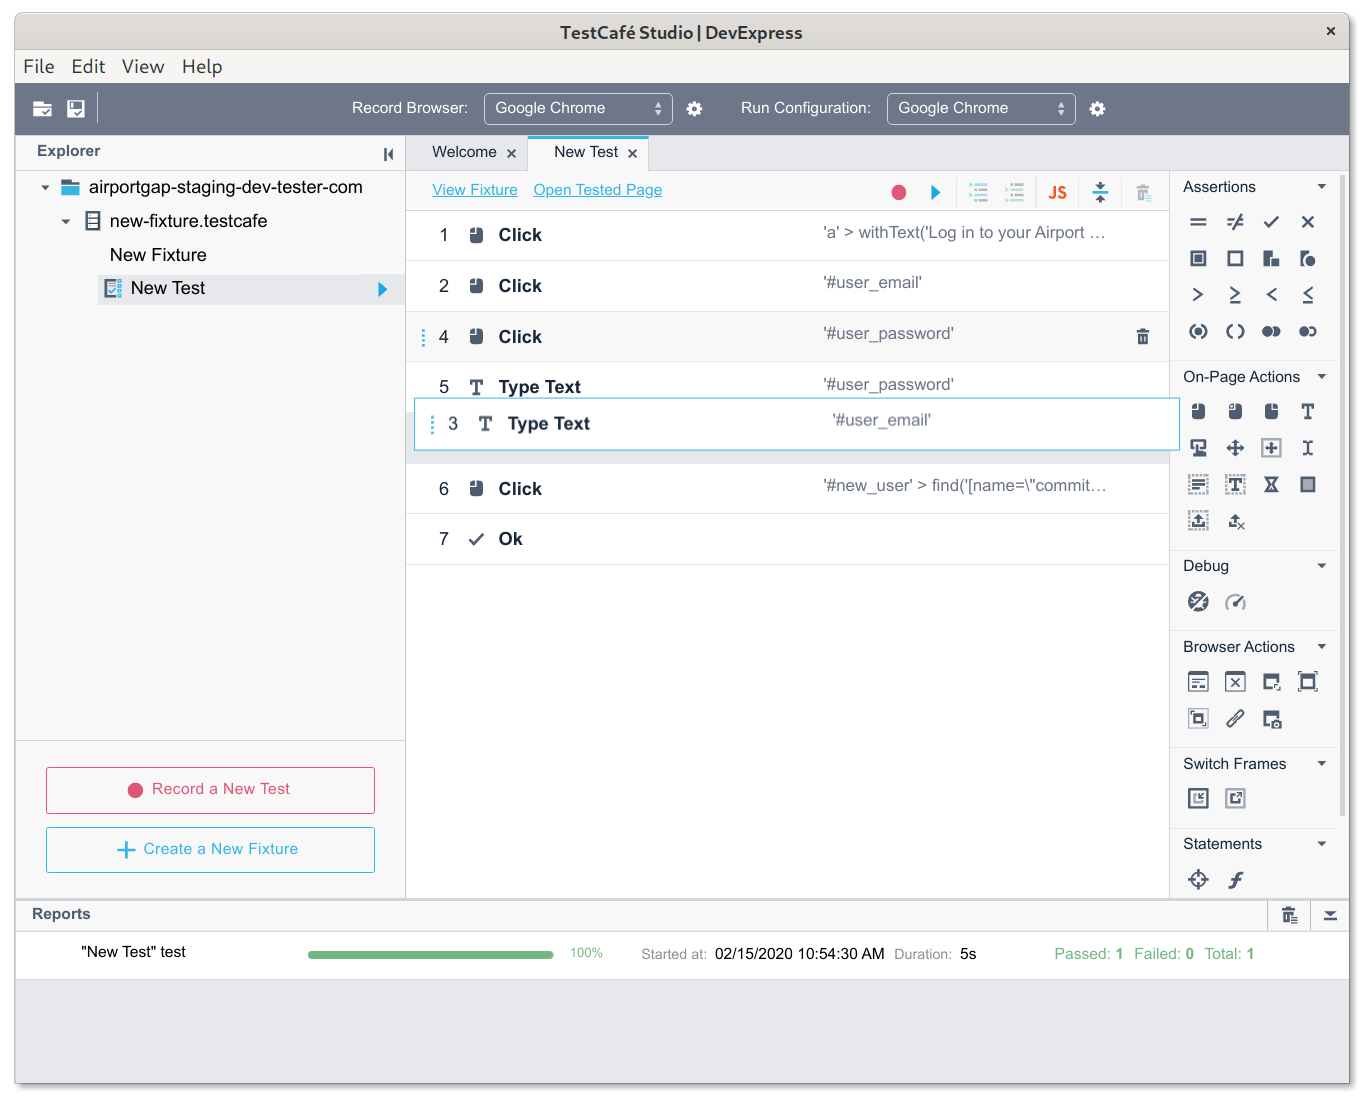
Reordering test steps
If the steps need to go in a different order, simply hover on the step, click and hold the three vertical dots on the left side of the step, and to drag the step to a new position.
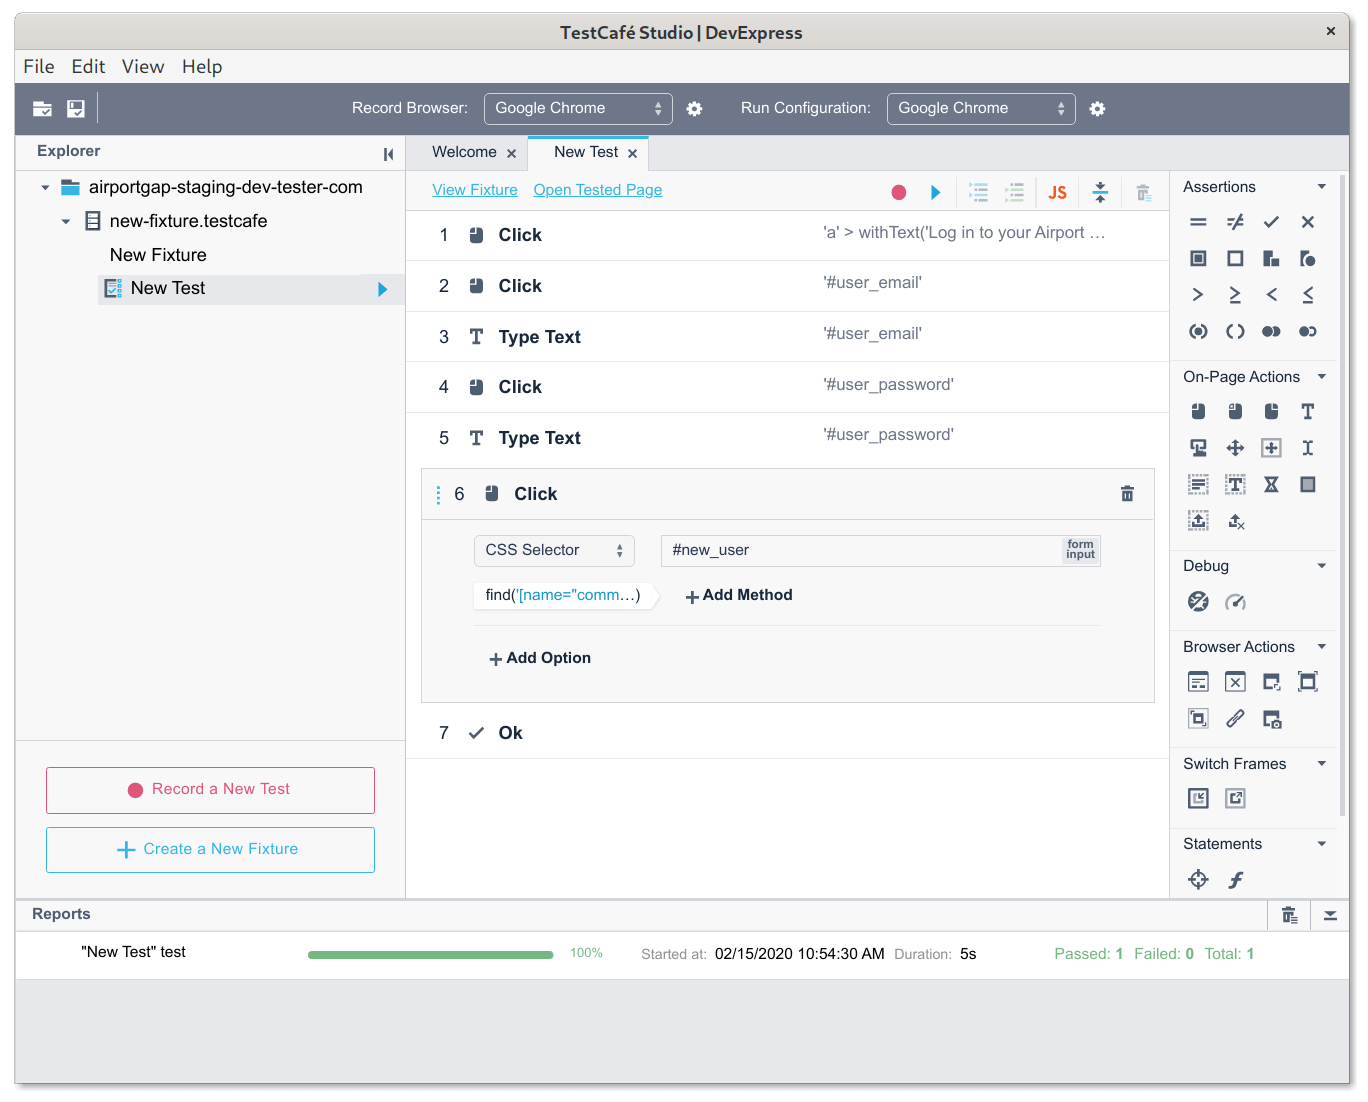
Editing a step
To edit an existing step, click on the step. The same section that appeared when creating an assertion appears, which allows editing of the step. The options that appear vary according to the type of step.
Adding new steps
If you need to add new steps to an existing test, click on the record icon on top of the test. Note that this is not the same as the "Record a New Test" button on the left-hand panel - that button creates a new test from scratch.
After clicking on the icon, the browser window opens, and the recorded steps run as before. The sequence pauses at the end of the recorded steps. Now we have the ability to record new steps, the same as when creating the test initially.
There is an issue here, however. Since the test replays when clicking on the record icon, there's no way to add a step in between existing steps. All new steps append at the end of the current test. If you need to add a new step in the middle of an existing test, you'll most likely have to delete the steps from the point you want to add a new step before recording.
Going beyond the basics
After creating tests, there are a few extra things that enhance TestCafe Studio's functionality.
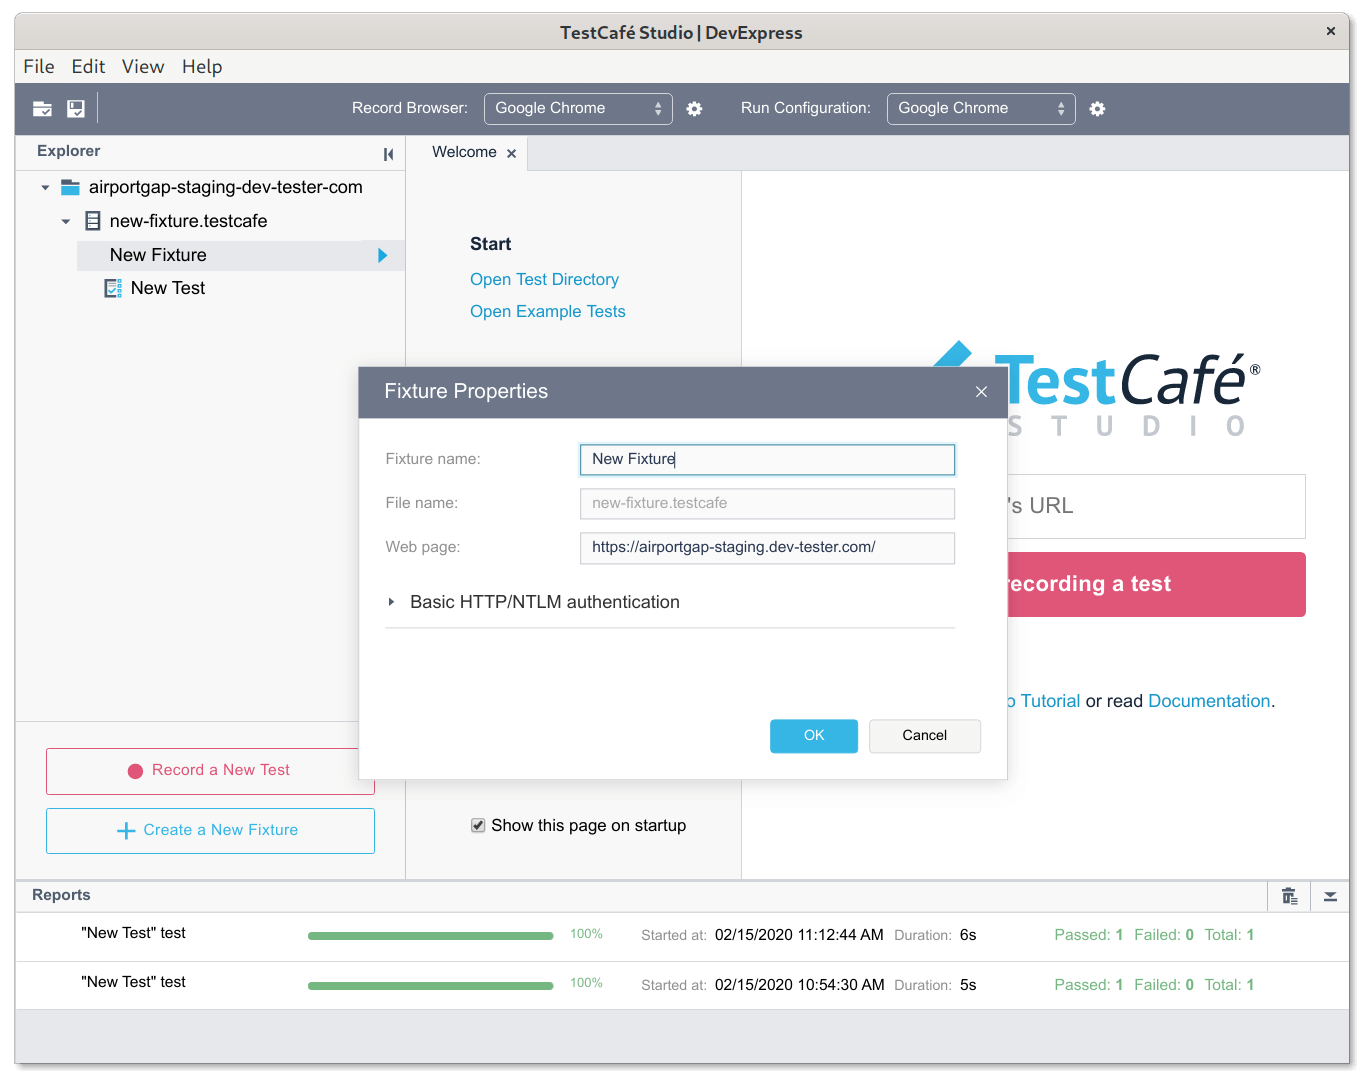
When recording a new test, TestCafe Studio creates a new fixture and test with the generic names of "New Fixture" and "New Test". It's not very useful, especially when you add more fixtures and tests to your test suite. It's good practice to name your fixtures and tests appropriate, as it helps identify what's executing at the time.
We can easily rename these in TestCafe Studio. Simply right-click the fixture to rename and select the Edit option. It allows you to rename the fixture, change the starting web page, and set up HTTP authentication for the tests.
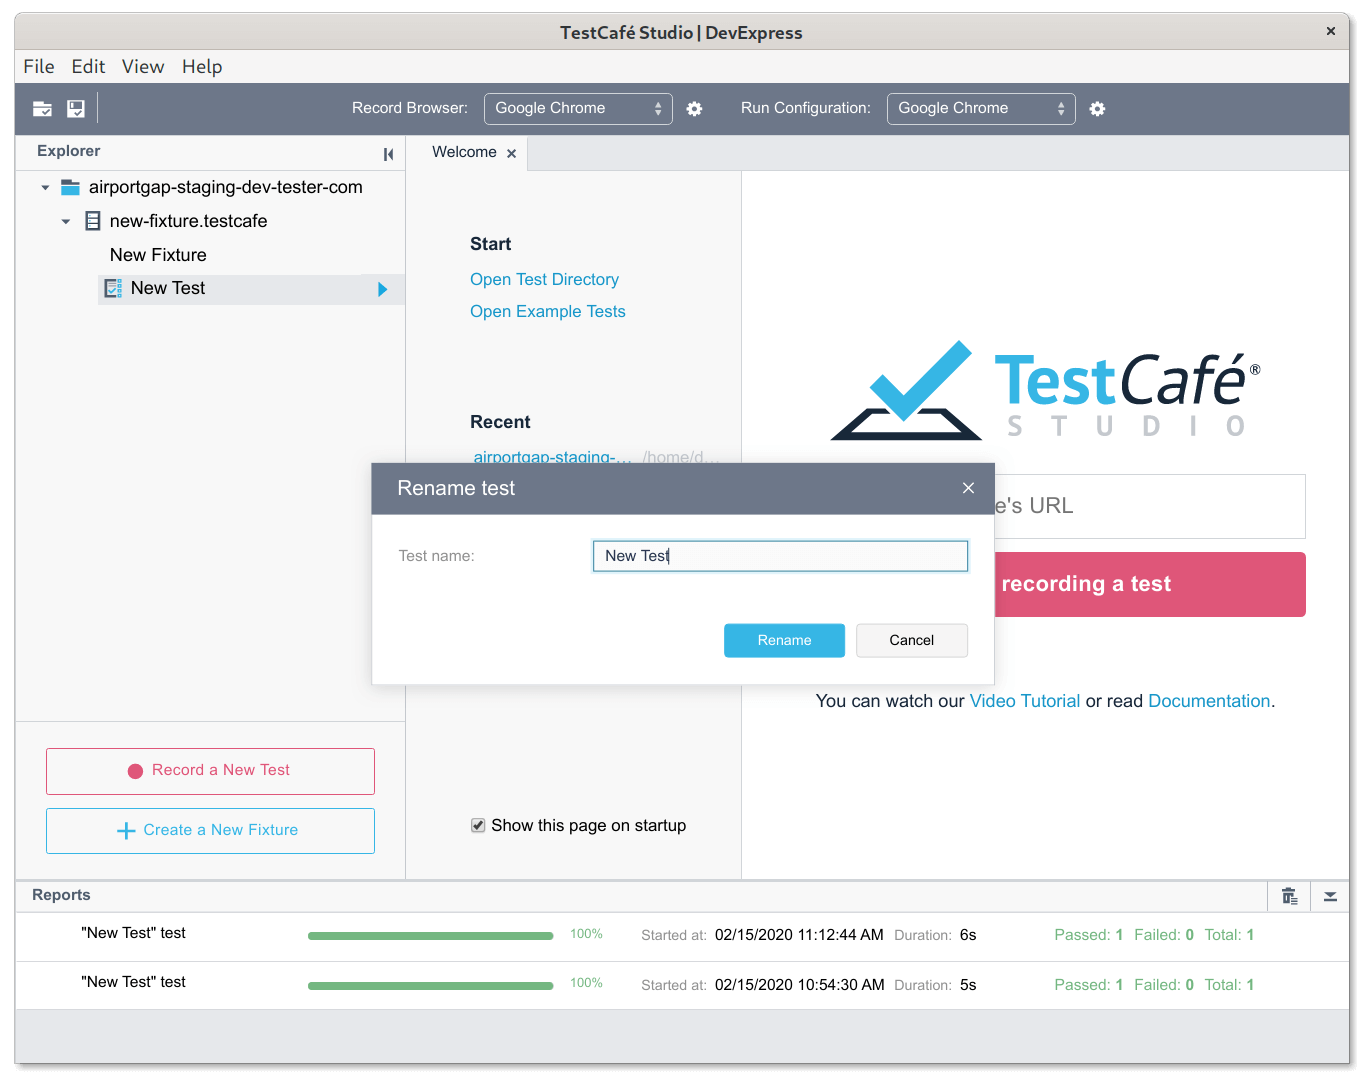
We can similarly rename tests by right-clicking the test and selecting the Rename option.
We can also begin creating new fixtures and tests here. Create a new test under an existing fixture by clicking on the "Record a New Test" button, or create a new fixture by clicking on the "Create a New Fixture" button.
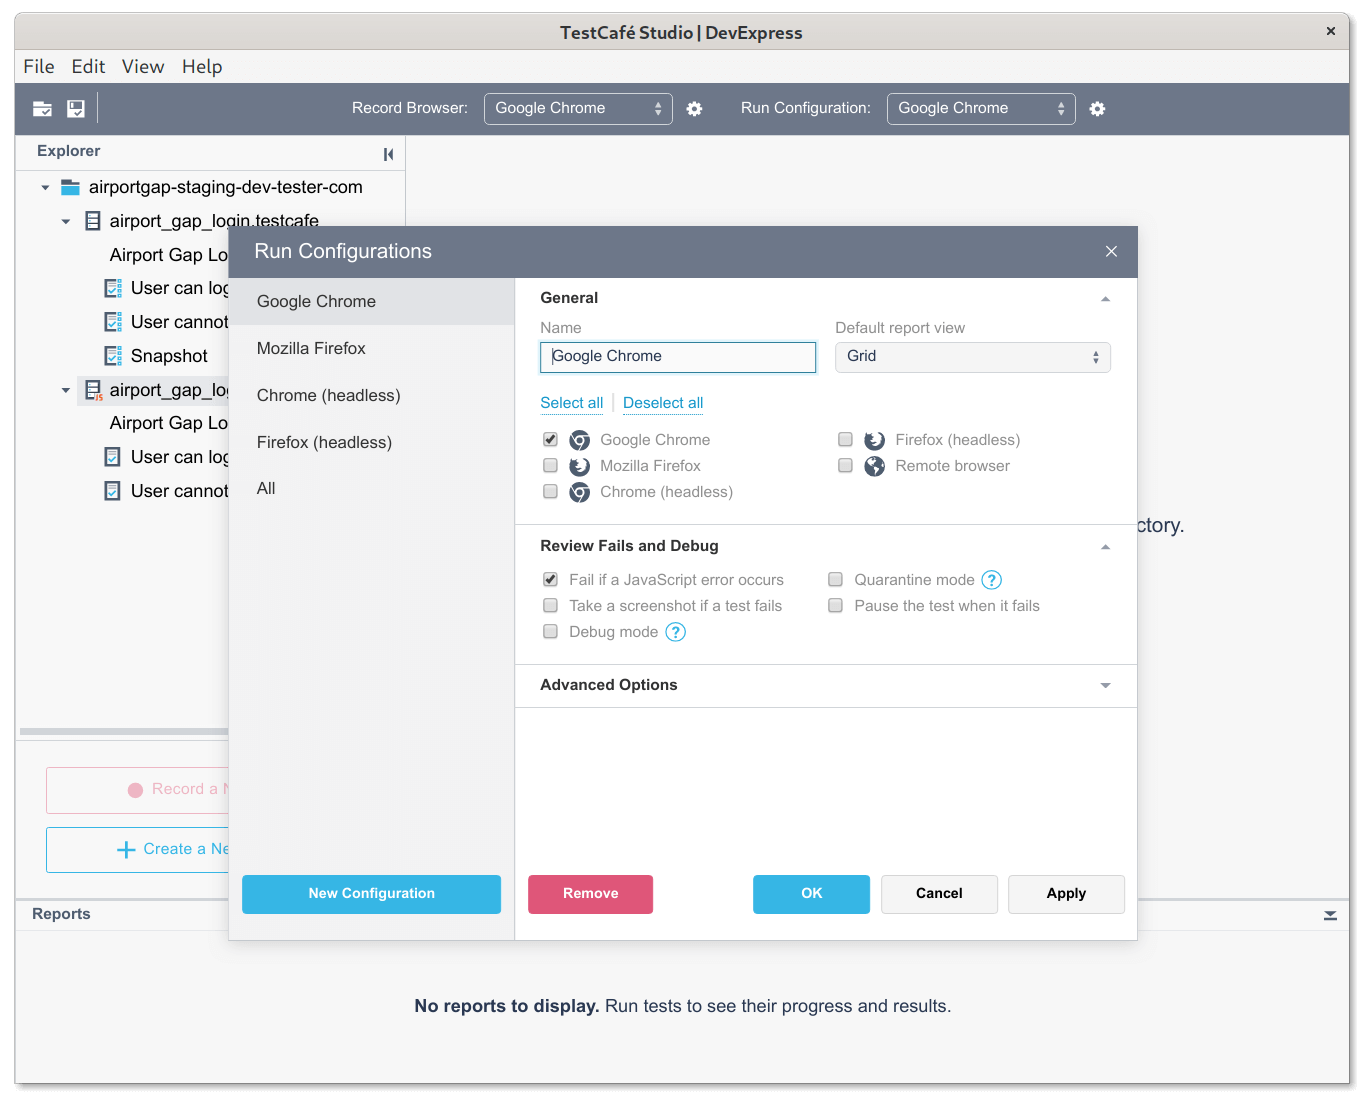
We can choose which browser to use for running tests. By default, the list of browsers includes the available browsers you have in your local system. It also includes an option to run the test simultaneously in two or more browsers, which is useful for quickly checking your application in different environments.
There's also the ability to modify this list for additional functionality while running tests. For instance, we can set up our browser to keep the browser open or take a screenshot if the test fails, or run the test in debug mode.
Another interesting bit of functionality is that TestCafe Studio can convert tests to JavaScript. The generated code is a standard TestCafe test so that it can run outside of TestCafe Studio. This functionality is handy if you want to export your tests out of TestCafe Studio.

How does the converted JavaScript compare to writing tests manually? It actually compares quite well and what I was expecting from the recorded tests. The generated JavaScript looks the same as if I were to write it by hand. It is a bit more verbose than I would have written, especially the selectors, but the generated code works excellent as it is.
Drawbacks of TestCafe Studio
As shown above, creating tests using TestCafe Studio is straightforward. It allows anyone to create a test suite even if they don't know anything about programming. However, the tool has its limitations and drawbacks from my perspective.
My main issue with test recording tools, not just TestCafe Studio, is the recording of unintended steps. It's not uncommon to click on sections of a page accidentally and have the action recorded in the test. I also noticed that many unnecessary keystrokes get recorded, like hitting the backspace key to fix a typo in a form field. It's inconvenient having to delete these steps all the time.
Another issue is the recording of keyboard shortcuts. It's helpful to record keyboard shortcuts to test special functionality in some web applications. However, it means that you really can't use shortcuts to copy/paste long-form text or navigate through fields, unless you want those steps recorded.
While TestCafe Studio runs simple tests like the example in this article with little problems, it's difficult to run more advanced scenarios like integrating third-party solutions. The tool can run custom scripts so you can write your test steps, but you might need to do extra work like installing other libraries manually before using them in a test.
I also found that I couldn't use TestCafe Studio well in specific scenarios. For instance, I couldn't find an easy way to integrate Percy for visual testing. I often found myself converting these types of tests to JavaScript, which feels like it defeats the entire purpose of using a test recording tool.
Finally, I had no luck using additional TestCafe plugins. For instance, there's no way to configure the BrowserStack plugin to run your tests on their service. If you need to run these kinds of tests, you need to run them on the command line. It doesn't relate to how TestCafe Studio creates tests, but it's an inconvenience nonetheless.
Summary: Should you use TestCafe Studio?
In all, TestCafe Studio is an extremely well-designed test recording tool. It contains all the basics of the TestCafe test framework in an easy-to-use package. As far as test recording tools go, it's one of the better solutions I've seen.
Its test recording capabilities work great and capture everything you need for basic end-to-end test flows. If you run into scenarios where you need a bit more control, there are plenty of options to manage your test directly in the tool.
Keep in mind that the tool also has its limitations. Once you need to do more than click around a website and type into simplistic forms, you'll quickly find yourself looking outside of the tool instead of having the tool help you.
You will eventually find yourself having to dive into coding as your test suite expands, and the need for advanced testing scenarios arises. I would strongly recommend learning how to write TestCafe tests without the recording tool in the long run.
However, if you're starting with test automation or don't know have the time to get into coding at this time, TestCafe Studio is still a convenient and handy tool. It will help you get started in your test automation journey.
Do you or your organization rely on test recording tools to build your test suite? Share your experiences by leaving a comment below!
Want to boost your automation testing skills?
With the End-to-End Testing with TestCafe book, you'll learn how to use TestCafe to write robust end-to-end tests and improve the quality of your code, boost your confidence in your work, and deliver faster with less bugs.
Enter your email address below to receive the first three chapters of the End-to-End Testing with TestCafe book for free and a discount not available anywhere else.